
Zero Touch
ZeroTouch is a unified endpoint management and security platform that provides real-time device provisioning, patch management, application deployment, and remote endpoint action capabilities.
Use Cases the Adapter Solves
- Unified Endpoint Visibility: Consolidate ZeroTouch-managed device inventory into Axonius alongside data from other sources to maintain a complete, deduplicated view of all endpoints across the organization.
- Patch and Compliance Enforcement: Identify devices with outdated OS builds or display versions to prioritize remediation and enforce patch compliance policies.
Asset Types Fetched
- Devices
Data Retrieved through the Adapter
Devices - fields such as: Name, Serial Number, Last Seen, Last Logged In User
Before You Begin
Required Ports
- TCP port 443 (HTTPS)
Authentication Methods
Zero Touch authenticates using a username and password
APIs
Axonius uses the Zero Touch REST API. The following endpoints are called:
POST /api/Auth/Login- Obtains a JWT bearer token using username and password credentialsPOST /api/devices/endpointlist- Retrieves the list of managed devices with pagination
Required Permissions
The following permissions are required:
ZeroTouch API User
- Access to the ZeroTouch External Client Endpoint API
- Permission to list devices via
POST /api/devices/endpointlist
Supported From Version
Supported from Axonius version 9.0.6
Connecting the Adapter in Axonius
- Navigate to the Adapter Catalog, search for Zero Touch, and select the adapter.
- Click Add Connection.
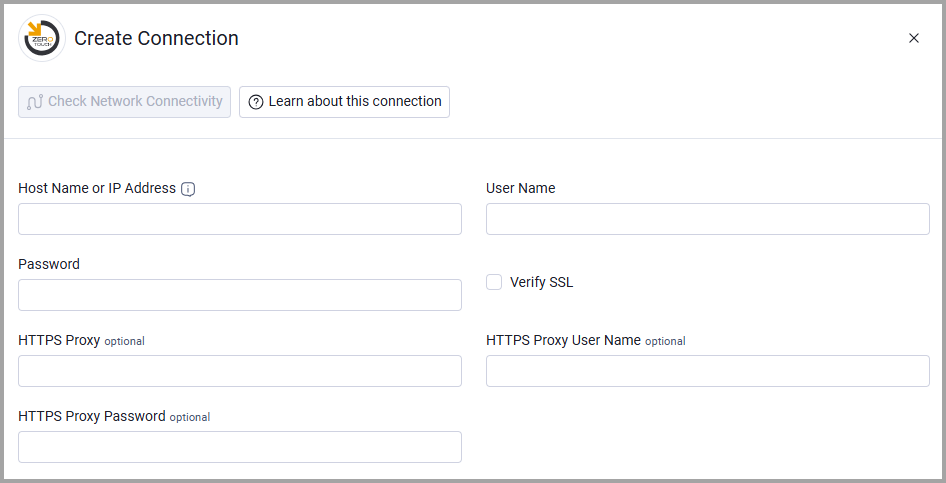
- Provide the following parameters.
Required Parameters
-
Host Name or IP Address - The base domain for the Zero Touch API. Must include the
https://prefix. Do not append any specific endpoint paths. Example:https://your-tenant.zerotouch.ai -
User Name - The user name of the ZeroTouch account used to authenticate and obtain an API token.
-
Password - The password of the ZeroTouch account.
Optional Parameters
- Verify SSL (default: enabled) - Select whether to verify the SSL certificate of the server against the CA database inside of Axonius. For more details, see SSL Trust & CA Settings.
- HTTPS Proxy - Connect the adapter to a proxy instead of directly connecting it to the domain.
- HTTPS Proxy User Name - The user name to use when connecting to the value supplied in Host Name or IP Address via the value supplied in HTTPS Proxy.
- HTTPS Proxy Password - The password to use when connecting to the server using the HTTPS Proxy.
To learn more about common adapter connection parameters and buttons, see Adding a New Adapter Connection.
Updated about 1 month ago