
Netgate pfSense
Netgate pfSense is an open-source firewall and router platform from Netgate. This adapter fetches the pfSense firewall and NAT rules, VPN tunnels (IPsec/OpenVPN), and routing data via the pfSense REST API v2.
Use Cases the Adapter Solves
- Firewall Rule Management: Gain visibility into firewall rules across your pfSense instances to ensure consistent security policies and identify potential misconfigurations.
- NAT Configuration Analysis: Analyze NAT port forwarding, outbound mappings, and one-to-one NAT rules to understand network address translation configurations and ensure proper access controls.
- VPN Tunnel Visibility: Track IPsec, OpenVPN, and WireGuard VPN tunnels to verify secure connectivity between sites and ensure compliance with security policies.
Asset Types Fetched
- Networks, Network/Firewall Rules
Data Retrieved through the Adapter
Networks
- Network Name, State, CIDR Blocks
- VPN Role (for VPN tunnels)
Network/Firewall Rules
- Firewall Name, Created At, Last Modified At
- Source, Destination, Protocols
Before You Begin
Required Ports
- TCP port 443 (HTTPS)
- TCP port 80 (HTTP) - if using an HTTP connection
Authentication Methods
The adapter supports two authentication methods:
- API Key (Recommended) - Authenticate using an API key via the
X-API-Keyheader in all API requests. - Basic Authentication - Authenticate using username and password from an existing admin account via HTTP Basic Authentication.
APIs
Axonius uses the pfSense REST API v2. The following endpoints are called:
GET /api/v2/firewall/rules- Retrieves firewall rulesGET /api/v2/firewall/aliases- Retrieves firewall aliases for IP and port translationGET /api/v2/firewall/nat/port_forwards- Retrieves NAT port forwarding rulesGET /api/v2/firewall/nat/outbound/mappings- Retrieves NAT outbound mappingsGET /api/v2/firewall/nat/one_to_one/mappings- Retrieves NAT one-to-one mappingsGET /api/v2/interfaces- Retrieves network interface informationGET /api/v2/vpn/ipsec/phase1s- Retrieves IPsec Phase 1 configurationsGET /api/v2/vpn/ipsec/phase2s- Retrieves IPsec Phase 2 configurationsGET /api/v2/vpn/openvpn/servers- Retrieves OpenVPN server configurationsGET /api/v2/vpn/openvpn/clients- Retrieves OpenVPN client configurationsGET /api/v2/vpn/wireguard/tunnels- Retrieves WireGuard tunnel configurationsGET /api/v2/vpn/wireguard/peers- Retrieves WireGuard peer configurationsGET /api/v2/routing/static_routes- Retrieves static routing configurations
Required Permissions
The API user must have appropriate permissions in pfSense to access the REST API endpoints.
Note
The exact permission names should be confirmed with your pfSense administrator or pfSense support, as the API documentation is not publicly available.
Supported From Version
Supported from Axonius version 8.0
Setting Up Netgate pfSense to Work with Axonius
To integrate the pfSense API with Axonius, you need to either generate an API key or use an existing admin account.
For API Key Authentication (Recommended):
- Log in to your pfSense web interface.
- Navigate to System > API.
- Enable the pfSense API if not already enabled.
- Create a new API key or use an existing one.
- Copy the API key for use in Axonius.
For Basic Authentication:
Use an existing pfSense admin account credentials. Ensure the account has sufficient privileges to access the API endpoints.
Connecting the Adapter in Axonius
Navigate to the Adapters page, search for Netgate pfSense, and click on the adapter tile.
Click Add Connection.
To connect the adapter in Axonius, provide the following parameters:
Required Parameters
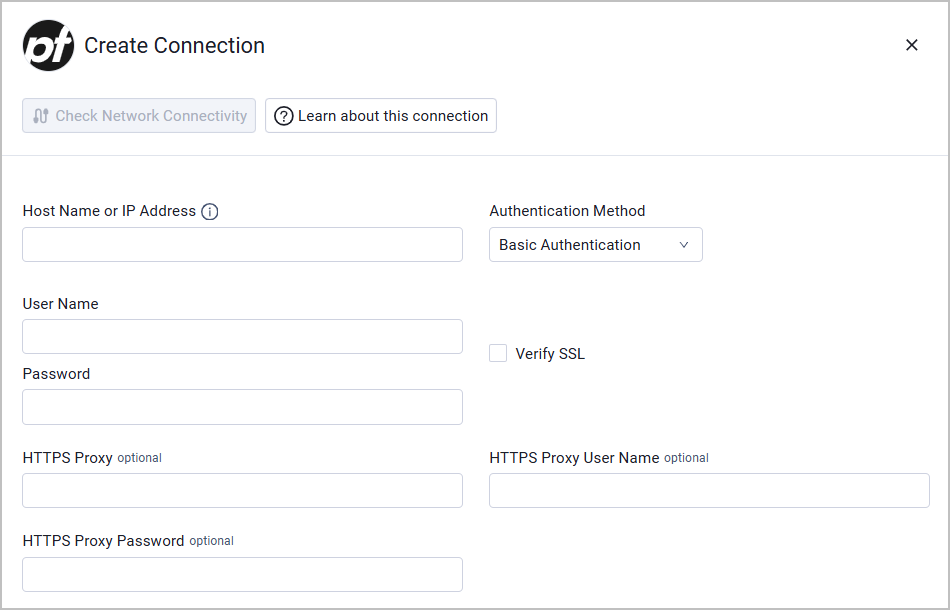
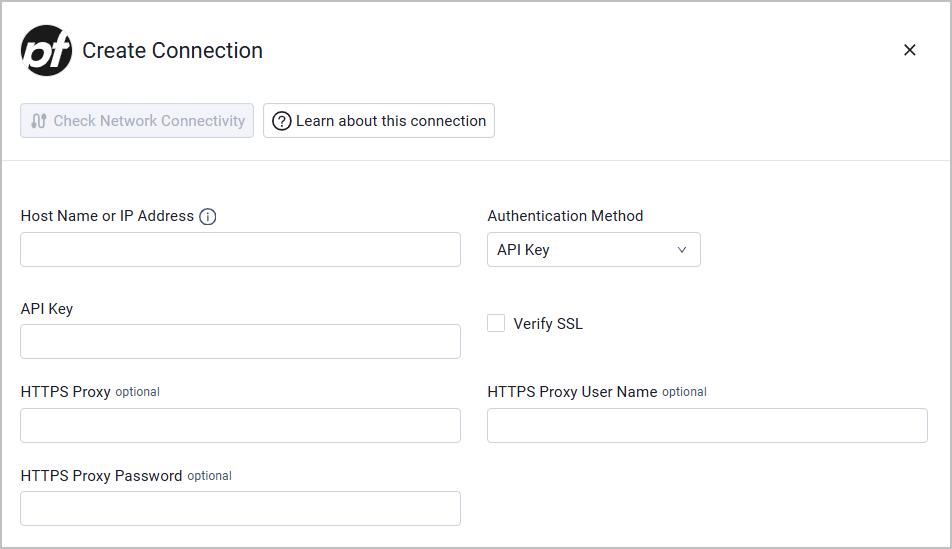
- Host Name or IP Address - Base domain for the API, should contain a prefix of
http://orhttps://. Do not add any specific endpoints after the domain. Example:https://pfsense.example.com/ - Authentication Method - Select between Basic Authentication and API Key.
Provide the Username and Password of an existing admin account with sufficient permissions.
Provide the API Key you generated in pfSense.
Optional Parameters
- Verify SSL - Select whether to verify the SSL certificate of the server against the CA database inside of Axonius. For more details, see SSL Trust & CA Settings.
- HTTPS Proxy - Connect the adapter to a proxy instead of directly connecting it to the domain.
- HTTPS Proxy User Name - The user name to use when connecting to the value supplied in Host Name or IP Address via the value supplied in HTTPS Proxy.
- HTTPS Proxy Password - The password to use when connecting to the server using the HTTPS Proxy.
To learn more about common adapter connection parameters and buttons, see Adding a New Adapter Connection.
Updated 6 days ago