
SQL Server
The SQL Server adapter imports device information from arbitrary SQL servers: Microsoft SQL Server, MySQL, Oracle and PostgreSQL.
Note
Axonius considers the results imported from the SQL server as if these were received from a CSV file. This means the imported data must include at least one column of required data as specified in the CSV adapter - Which fields will be imported with a devices file?
Types of Assets Fetched
This adapter fetches the following types of assets:
- Devices
- Users
- Databases
- Networks
- Accounts/Tenants
- Application Resources
- URLs
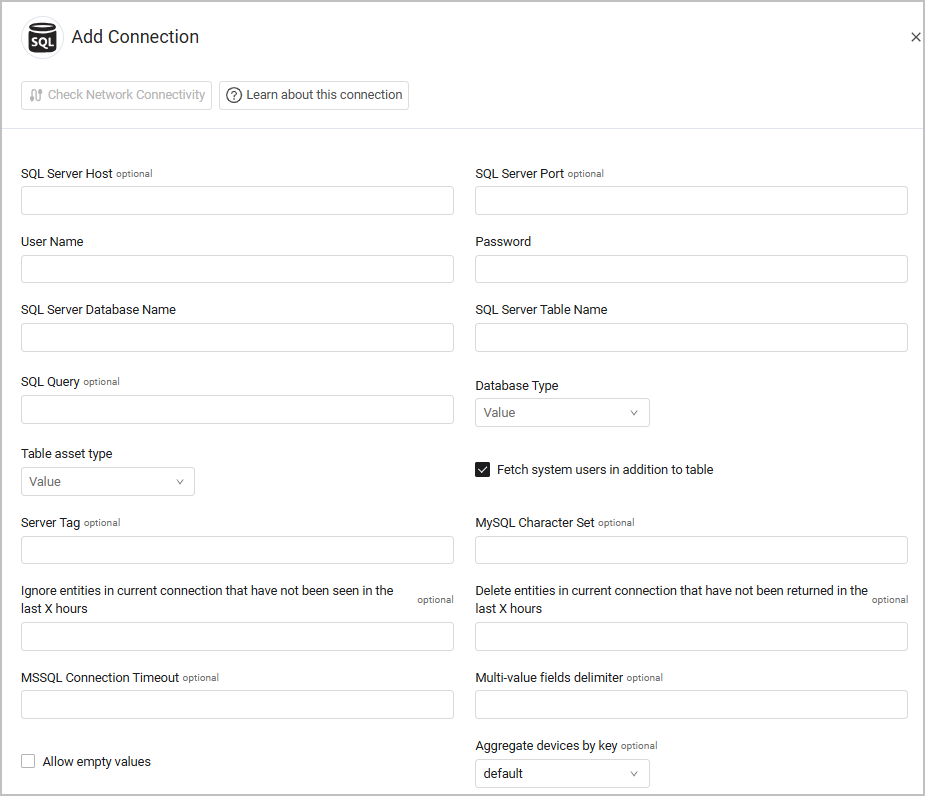
Parameters
- SQL Server Host (optional) - The hostname / domain of the SQL server.
For MSSQL:- To use a specific named instance, the value supplied should be in the following format:
{server_host}\{instance_name}. - If no instance is supplied, the default instance will be used.
- To use a specific named instance, the value supplied should be in the following format:
- SQL Server Port (optional) - The port of the SQL server. For MSSQL the required ports are:
- Microsoft SQL Server discovery port - 1433.
- The specific port for the supplied named instance, if relevant.
- User Name (required) - The credentials for a user account that has the required permissions to fetch assets.
Note
The best practice is to create a dedicated SQL local user for Axonius usage. For details on creating an Axonius user for Microsoft SQL Server, see Creating a Local Read-Only User for Microsoft SQL Server.
If you are using a domain user, specify the domain and the user name in the following format: domain\username.
If you are using Athena for your database type, enter your access key and secret key in the User Name and Password fields.
- Password (required) - The user's password. The password must not include ";".
- SQL Server Database Name (required) - The database to connect to.
- SQL Server Table Name (required) - The name of the table to fetch information from. Axonius runs a 'SELECT * FROM [[specified value]]' statement.
- SQL Query (optional) - Enter a query to run in SQL Server.
Note
- Only read-only queries are allowed.
- Do not put ";" at the end of the query.
- Chained queries are not allowed.
- Database Type (required) - Select between MSSQL, PostgreSQL, MySQL, Oracle, HyperSQL, or Athena. MySQL also supports the MariaDB.
- If Athena is selected, the following parameters appear:
- Region (required) - The AWS region in which the Athena DB is located.
- Output Bucket (required) - The S3 bucket used to output the query execution results.
- If either PostgreSQL or MySQL are selected, the following parameters appear:
- SSL Connection - Turn this on to enable SSL connection. When enabled, upload the following certificates: Root Certificate File, Client Certificate File, and Client Private Key File.
- If Athena is selected, the following parameters appear:
- Table asset type - Select the asset type associated with the SQL Server table. Axonius will consider the data fetched from the specified table as the data of the selected asset type.
- When selecting Devices, you can also fetch Software Vulnerabilities data in addition to device data. table with Software Vulnerabilities data must contain a CVE ID field. See CSV for more information.
- When selecting Databases, only databases listed under the SQL instance are fetched. This option is only valid when a valid SQL Query is provided. If no query is provided, a default query, "Select * from
{Table Name}" will be used.
- Fetch system users in addition to table (default: true) - Select this option to not only fetch the SQL Server Table Name provided in the configuration but also query the system's Service Principle table for extra user assets.
- Server Tag (optional) - Specify a custom tag for the SQL Server adapter connection that you have configured.
- MySQL Character Set (optional) - Specify a custom character set (encoding) for connections to MySQL databases. Example values: 'utf8', 'latin1'. When no character set is specified, 'utf8' is used by default.
Note
This option is only valid when MySQL is selected from the Database Type dropdown.
- Ignore entities in current connection that have not been seen in the last X hours (optional) - Specify the number of hours, so that the system will not fetch entities that were not seen in the last x hours. When Is Users Table is configured, this refers to users; otherwise, this refers to devices.
- Delete entities in current connection that have not been returned in the last X hours (optional) - Specify the number of hours, so that the system will delete entities that were not fetched in the last x hours. When Is Users Table is configured, this refers to users; otherwise this refers to devices.
- MSSQL Connection Timeout (optional) - Specify a custom timeout in seconds for MSSQL connections.
- Multi-value fields delimiter (optional) - Specify a delimiter to separate between values within the same column in the imported SQL table. When you specify a delimiter Axonius considers fields that contain the specified delimiter as multi-value fields. For example, ';'. Otherwise Axonius considers all imported fields as single-value fields.
- Allow empty values - Select this option to allow the system to support assets with empty fields. If an asset was created with a field that contained a value, when the SQL file subsequently contains an empty field with the same name, the device or user asset will display that field without a value in it.
- Aggregate devices by key (optional) - Select a key to aggregate assets by. The default option results in the following string:
{id or hostname or serial or name or maccaddress}_{table_name}_{instance}_{hostname}_{serial}_{name}Example:
table_name = "MyTable"
Device: {
  'id': 'id1',
  'serial': 'serial'
}
aggregation_key = "id_MyTable_serial"
To learn more about common adapter connection parameters and buttons, see Adding a New Adapter Connection.
Advanced Settings
Note
Advanced settings can either apply to all connections for this adapter, or to a specific connection. Refer to Advanced Configuration for Adapters.
- Set Time Zone - Set the time zone of date/time field values fetched with this adapter. Default is UTC.
- SQL pagination (required, default: 1000) - Set the number of results per page received for a given SQL query, to gain better control of the performance of all connections for this adapter.
- Add dynamic date raw field (required, default: false) - Select whether to duplicate each date field appearing in the MSSQL database as a text value. The name of the new field is appended with the ‘_raw’ suffix.
- Parse Asset Name as Hostname when Hostname is missing (required, default: false) - Select this option to use the Asset Name as the Hostname value when no Hostname value is provided.
- Parse entity fields dynamically - This setting is enabled by default so that the adapter dynamically parses all of the fields of the entity fetched. Unselect to disable this setting.
- Enable Custom Parsing - Enable this option to define how to parse specific fields from the raw data fetched. You can choose to parse the data into an already existing field, or create a new one. This adapter supports Custom Parsing for all the asset types fetched by this adapter. See Adapter Custom Parsing for more information.
Note
In the Raw Path parameter of Custom Parsing, it is recommended to copy the path directly from the JSON view inside the asset profile. See more details in the JSON and XML Advanced View section, under Adapter Connections.
- Ignore hostname if IP is present - Select this option to ignore the hostname parsing if it contains an IP address from the asset's IP address list.
- Aggregate devices by key - Select a key to aggregate devices by: Name, Hostname, IP address, MAC address, or Serial number.
Note
To learn more about Adapter Configuration tab advanced settings, see Adapter Advanced Settings.
Enabling TCP/IP for the SQL Server
In order to connect to the SQL instance, TCP must be enabled. By default, Microsoft SQL or Microsoft SQL Express has TCP/IP access disabled. Perform the following on the SQL Server Configuration Manager to make sure that TCP/IP access is enabled on your server.
-
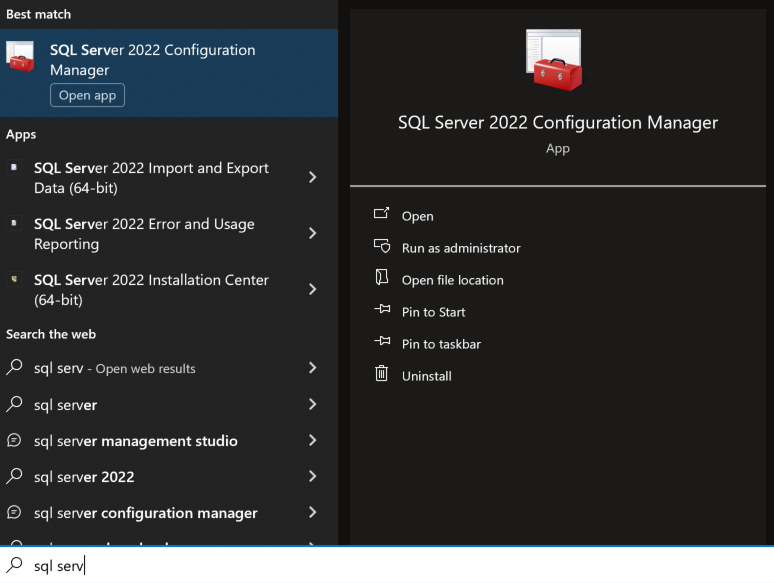
Open the SQL Server Configuration Manager.
-
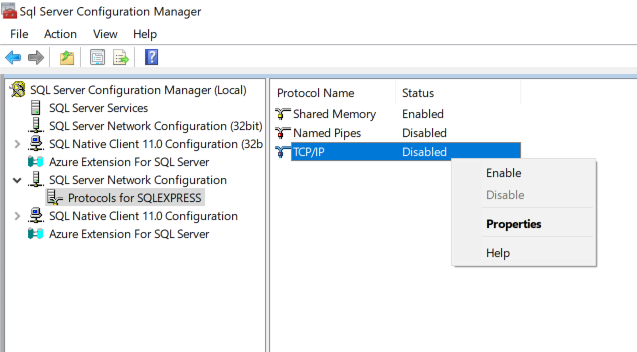
Under SQLServer Network Configuration, click Protocols for SQLEXPRESS (or the equivalent for your SQL server).
-
If TCP/IP is set to 'Disabled', right click and select 'Enable'.
-
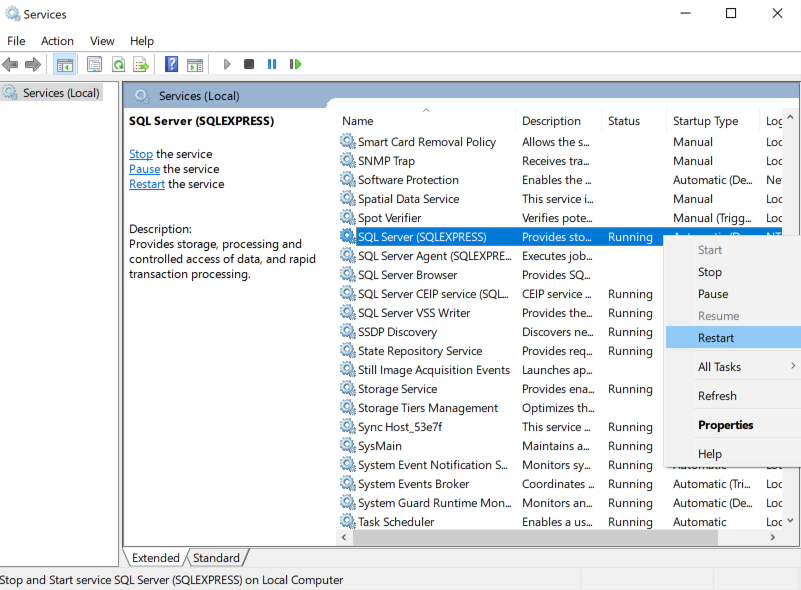
The system informs you that your changes will be saved, but that you need to stop and restart the SQL Service. Go to Services on your system and restart the SQL Service.
Creating a Local Read-Only User for Microsoft SQL Server
To connect to the Microsoft SQL Server to create a Local Read-Only User, you can use Microsoft SQL Server Management Studio. If you don't have it on your local machine, you can probably find it on the machine the Microsoft SQL Server is installed on.
After connecting to the server, you should do the following:
-
If you don't have the name of your database, expand the Databases folder which shows all the databases in this server. Your database should appear here, starting with "CM_".
-
Navigate to the Security folder, right click and under Server Properties, in Server authentication, select SQL Server and Windows Authentication mode.
-
Navigate to the Security folder and expand it. Right-click the Logins folder and click New Login.
.png)
-
Create a user using the "SQL Server Authentication" option. Fill in the details and select your database from the Default Database List.
.png)
-
Navigate to the User Mapping page, and check the check box for the database that your login can access. In the Database role membership list, leave the default option public selected, and select the db_datareader check box.
.png)
-
Click OK and create the user.
-
Reconnect with the new user to validate that it was indeed created (File -> Connect Object Explorer).
.png)
Troubleshooting
- "Login failed" - If you are using a domain user, in the User Name field, specify the domain and the user name in the following format: domain\username.
Related Enforcement Actions
Updated about 2 months ago