
HTTP Server - Send to Webhook per Asset
HTTP Server - Send to Webhook per Asset serializes each asset as JSON and sends its JSON data to a configured webhook for:
- Assets returned by the selected query or assets selected on the relevant asset page.
Note
When run on a query, only the fields configured in the query are added to the JSON.
See Creating Enforcement Sets to learn more about adding Enforcement Actions to Enforcement Sets.
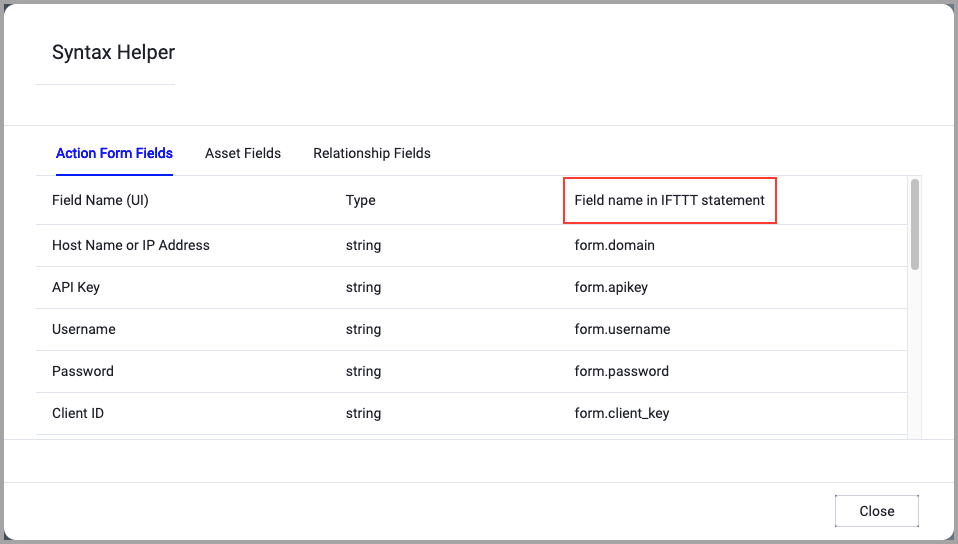
When accessing an enforcement action using the API, you must use the backend form of field names.
Use the Syntax Helper to find the correct name. In the enforcement action, enable Configure Dynamic Values and select Syntax Helper.
Note
- Not all asset types are supported for all Enforcement Actions.
- See Actions supported for Activity Logs, Adapters Fetch History, and Asset Investigation modules.
- See Actions supported for Aggregated Security Findings.
- See Actions supported for Software.
Required Fields
These fields must be configured to run the Enforcement Set.
- Action name - The name of this Enforcement Action. The system sets a default name. You can change the name.
- Configure Dynamic Values (optional) - Toggle on to enter a Dynamic Value statement. See Creating Enforcement Action Dynamic Value Statements to learn more about Dynamic Value statement syntax.
-
Webhook URL - Specify the webhook URL.
-
Custom format for body (use
{\$BODY}as keyword)(default:{"entities": {$BODY}}) - You can customize the webhook body. -
Use
{\$BODY}to include the entities found in the saved query supplied as a trigger (or entities that have been selected in the asset table) data. -
Use
{\$BODY_ESCAPED}instead of{$BODY}if you want to escape JSON characters so that the JSON is sent as a string instead of an object. -
Connection timeout (seconds) (default: 10 seconds) - Define the number of seconds before the attempt to connect to the webhook is considered to be timed out. As a result, the enforcement action execution will fail.
-
Writing data to webhook timeout (seconds) (default: 1200 seconds) - Define the maximum number of seconds before the attempt of completing sending the data to the webhook is considered to be timed out. As a result, the enforcement action execution will fail.
-
Compute Node - The Axonius node to use when connecting to the specified host. For more details, see Working with Axonius Compute Nodes.
Additional Fields
These fields are optional.
-
Authorization header user name and Authorization header password - Specify the authorization header user name and password, if required. Axonius will pass the specified authorization header information along with the Webhook URL.
-
API key for authorization - Enter an API key to use for authorization.
-
Verify SSL (Optional) (default: enabled) - Selects whether to verify the SSL certificate of the server against the CA database inside of Axonius. For more details, see SSL Trust & CA Settings. This setting is enabled by default on all new adapter settings. If you need to disable SSL verification, make sure you disable this setting.)
-
HTTPS Proxy (optional) - Connect the adapter to a proxy instead of directly connecting it to the domain.
-
HTTP proxy - When a proxy is supplied, Axonius will use the proxy, instead of the direct URL, when connecting to the HTTP Webhook URL.
-
Additional headers (default:
{"Content-type": "application/json"}) - Add Customized Headers to be Sent with Request. For Example:
{"Content-type":"application/json","Accept":"application/json","Authorization":"Bearer "}
-
Gateway Name - Select the Gateway through which to connect to perform the action.
For more details about other enforcement actions available, see Action Library.
Updated 11 months ago