
Verkada
Verkada is a cloud-based security platform offering video surveillance, access control, and environmental sensors.
Asset Types Fetched
![]() Devices |
Devices | ![]() Users
Users
Before You Begin
Ports
- TCP port 443
Authentication Method
API Key
APIs
Axonius uses the Verkada API.
API Endpoints Used to Fetch Data:
GET /cameras/v1/devices- for camerasGET /cameras/v1/alerts- Camera AlertsGET /access/v1/doors- Doors (Access Control)GET /sensors/v1/devices- Sensors (Environmental Sensors)GET /sensors/v1/alerts- Sensor AlertsGET /access/v1/access_users- Access Users
Permissions
The following permissions are required:
The API Key must have the following permissions configured in Verkada Command:
Camera Permissions
- Read access to Camera devices - Required for
/cameras/v1/devicesendpoint - Read access to Camera alerts - Required for
/cameras/v1/alertsendpoint
Access Control Permissions
- Read access to Doors - Required for
/access/v1/doorsendpoint - Read access to Access Users - Required for
/access/v1/access_usersendpoint
Sensor Permissions
- Read access to Sensor devices - Required for
/sensors/v1/devicesendpoint - Read access to Sensor alerts - Required for
/sensors/v1/alertsendpoint
Note: The exact permission names and role requirements should be confirmed with your Verkada administrator or in the Verkada Command platform.
Supported From Version
Supported from Axonius version 6.1
Connecting the Adapter in Axonius
Navigate to the Adapters page, search for Verkada, and click on the adapter tile. Click Add Connection.
To connect the adapter in Axonius, provide the following parameters:
Required Parameters
- Host Name or IP Address - The hostname or IP address of the Verkada server.
- API Key - An API Key associated with a user account that has the Required Permissions to fetch assets.
- Connection Label - A label to help you distinguish between multiple connections for the same adapter. See Connection label.
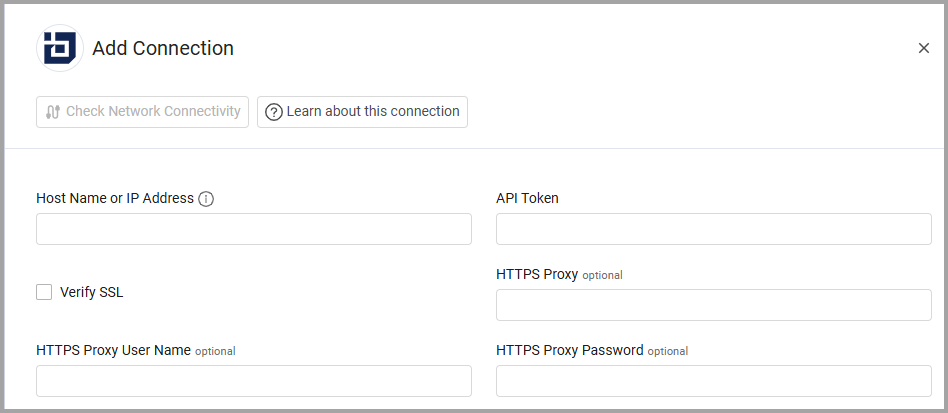
Optional Parameters
- Verify SSL - Select whether to verify the SSL certificate of the server against the CA database inside of Axonius. For more details, see SSL Trust & CA Settings.
- HTTPS Proxy - Connect the adapter to a proxy instead of directly connecting it to the domain.
- HTTPS Proxy User Name - The user name to use when connecting to the value supplied in Host Name or IP Address via the value supplied in HTTPS Proxy.
- HTTPS Proxy Password - The password to use when connecting to the server using the HTTPS Proxy.
-
Select Gateway – Select the Axonius Gateway to use when connecting adapters whose sources are only accessible by an internal network and not from the primary Axonius instance, which may be an Axonius-hosted (SaaS) instance or Customer-hosted (on-premises / private cloud). To use this option, you need to set up an Axonius Gateway.
To learn more about common adapter connection parameters and buttons, see Adding a New Adapter Connection.
Advanced Settings
Note
- Advanced settings can apply to either all connections of this adapter, or to a specific connection. For more detailed information, see Advanced Configuration for Adapters.
- For more general information about advanced settings, see Adapter Advanced Settings.
- Fetch Cameras - By default the system fetches cameras. Clear this option to not fetch camera devices and alerts.
- Fetch Doors - By default the system fetches doors. Clear this option to not fetch control doors.
- Fetch Sensors - By default the system fetches sensor devices and alerts. Clear this option to not fetch sensor devices and alerts.
- Fetch Access Users - By default the system fetches sensor access control users. Clear this option to not fetch access control users.
Updated 21 days ago