
Manually Creating an Asset
You can manually create assets based on custom data. This allows you to create your own assets with your own data. This is useful for assets with “one-off” characteristics. Once created, these assets are exactly the same as any other asset in the system. When creating a new asset, the required field names for that asset are automatically presented in the dialog. You can save the new asset only after assigning values for all required fields, and in the case of a required complex field, first choosing an object (i.e., child field) and then assigning it a value.
Note
Creating a new asset is not available when the Assets page's view is set to Latest Snapshot View or Historical Data View.
To create an asset manually:
- On the relevant Assets page, click + Create New Asset.

The Create new asset dialog opens with entries for the required fields of the asset type being added.
For example, the following is the dialog for creating a new Device asset. You need to fill in the displayed fields with values in order to create the new asset.
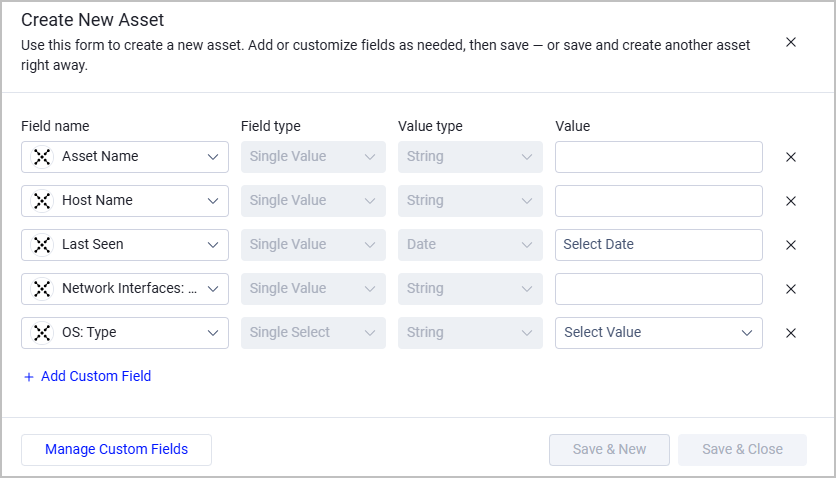
- For all required fields, fill in values or select a value from the dropdown options - depending on the field type. For example:
- Asset Name - a Single Value field, enter a name (string).
- OS: Type - a Single Select field, select a value from the dropdown list.
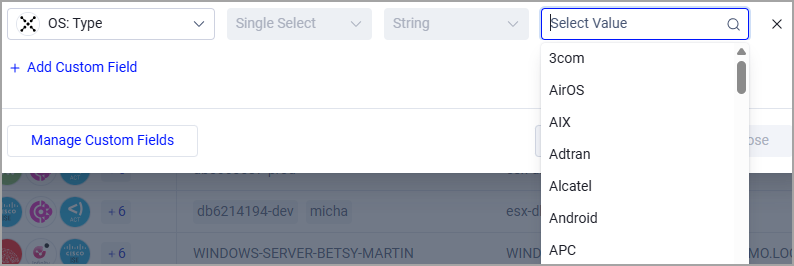
- For each existing or new field that you want to add to the asset:
- Click + Add Custom Field.
- In the field row that opens, select an existing field, or start typing the name of a new field and then click + New Field Name.
- Fill in or select values for added fields. To delete a field value, click the x to the right of the Value box. Note that if you don't provide a new value and leave this box empty - the field is deleted from the asset.
For details on the different custom field types and inputs you can add, see Creating New Custom Fields.
Note
It is recommended to add an asset name to the new asset even if it is not a required field, so you can easily identify the asset in the Assets table.
- Choose how to proceed:
- To save your changes and return to the Assets page: Select Save & Close. The following notification appears: Created new asset. The new asset is added to the Assets table. You might need to filter the table to see it.
- To save your changes and proceed to create more new assets: Select Save & New. The system saves this asset and immediately reopens a clean empty form, so you can create asset after asset without having to close and re-open the dialog each time.
You can also click Manage Custom Fields to open the Custom Data Management screen, where you can manage all Custom Fields in the system from one central location.
Example - Creating a New Expense Asset
The following screen shows the Create new asset dialog that opens when creating a new Expense asset.
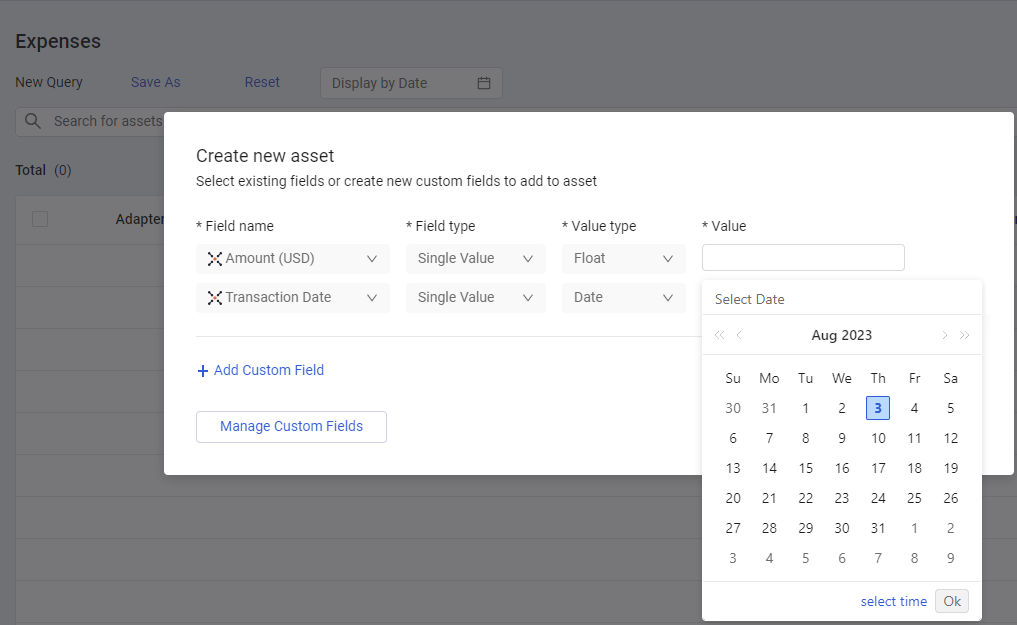
In this example, you must add a value to the two existing required aggregated fields:
- Amount (USD)
-Float type field. - Transaction Date
-Date type field.
In addition to the required fields that appear on the new asset's screen, you can add optional existing fields or new fields. When you add these optional fields, you need to assign them values in order to create the new asset.
Updated about 1 month ago