
Fortinet FortiGate
Fortinet FortiGate is a next-generation firewall providing security and visibility for end-to-end protection across the entire enterprise network.
Note:
For FortiManager use the FortiManager adapter.
Asset Types Fetched
This adapter fetches the following types of assets:
- Devices, Users, Groups, Network/Firewall Rules, Network Devices, Alerts/Incidents
Before You Begin
Required Permissions
The value supplied for User Name, if used when connecting the adapter, must have read access to devices.
In addition, you need to create an Administrator profile and a FortiManager API locally defined API admin user, and assign the required permissions in the process.
Creating an Administrator Profile
-
On the FortiManager GUI, select System Settings
>Admin Profiles>Create New. -
Populate the fields as shown in the image below.
-
Select the permissions of your choice.
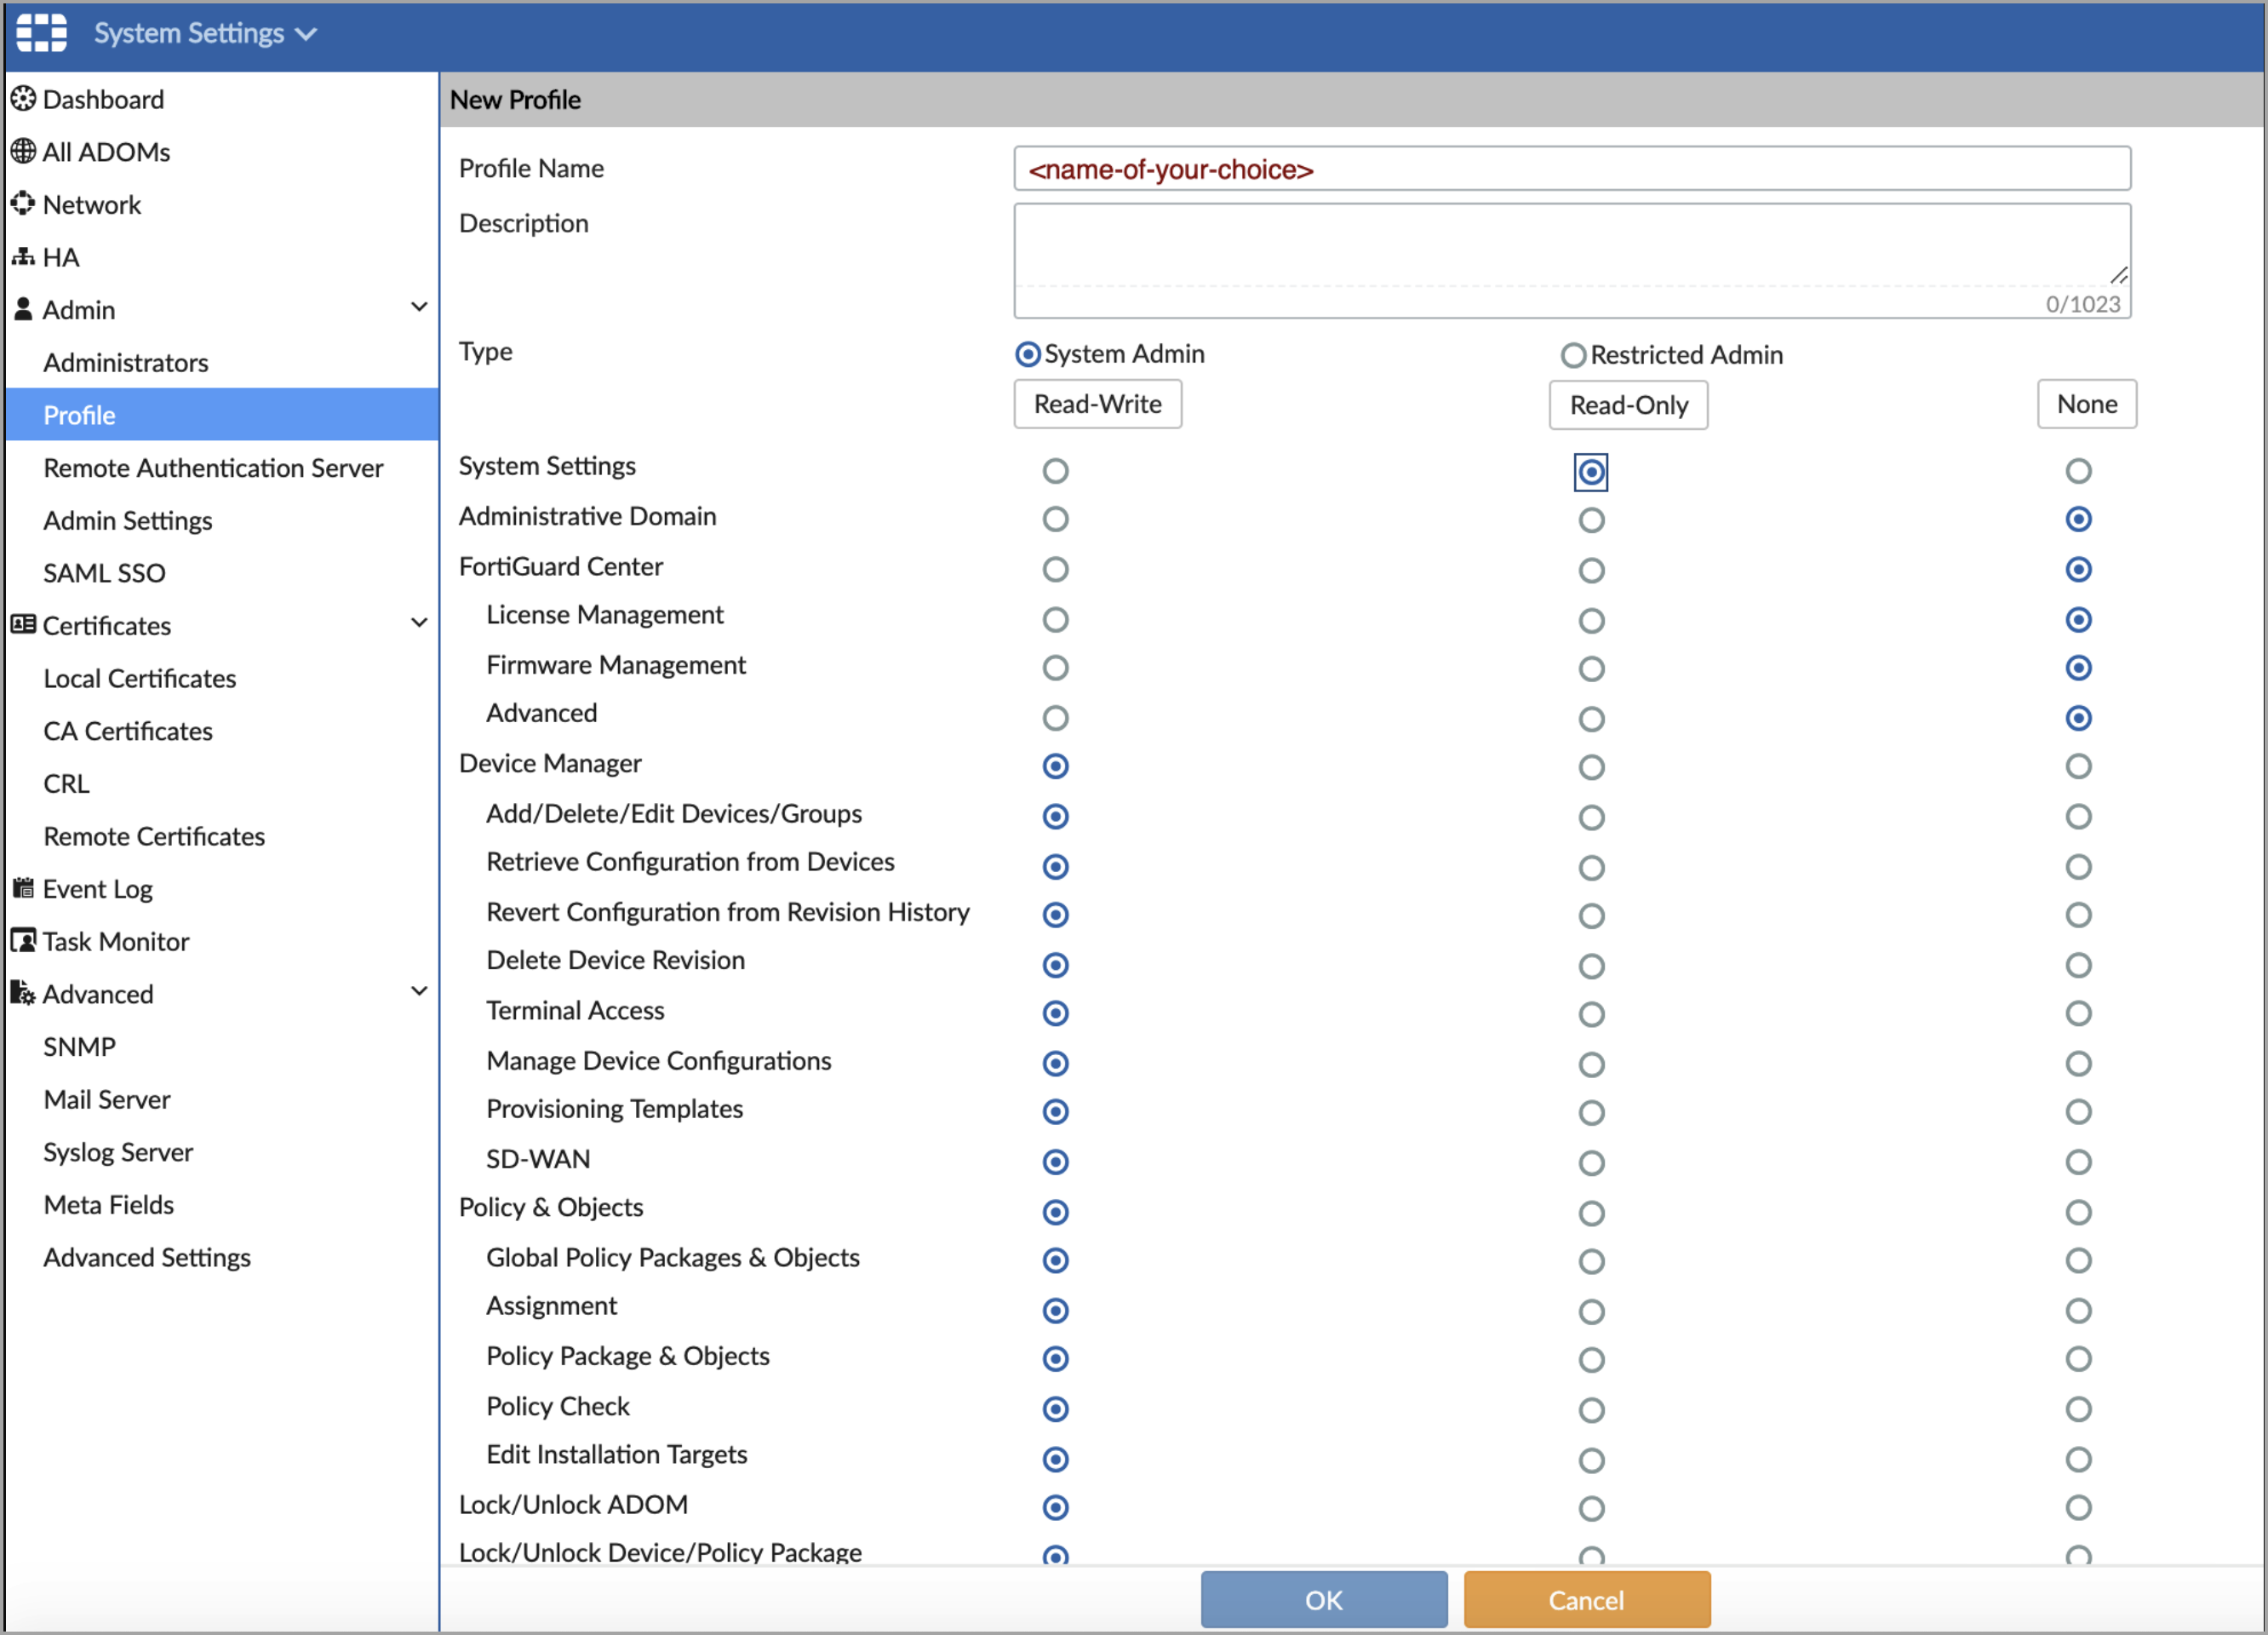
-
Click OK.
Creating the JSON API Admin
After you create your administrator profile, use the steps below to create a FortiManager API locally defined API admin user.
Notes
The JSON API admin should have the minimum permissions required to complete the request.
The API admin can be locally defined or defined on some external LDAP, RADIUS, TACACS servers.
-
On the FortiManager GUI, select System Settings
>Administrators>Create New. -
Populate the fields as shown in the image below. Make sure you assign select:read (rpc-permit), ALL ADOMs, and ALL Packages (Policy Package Access).
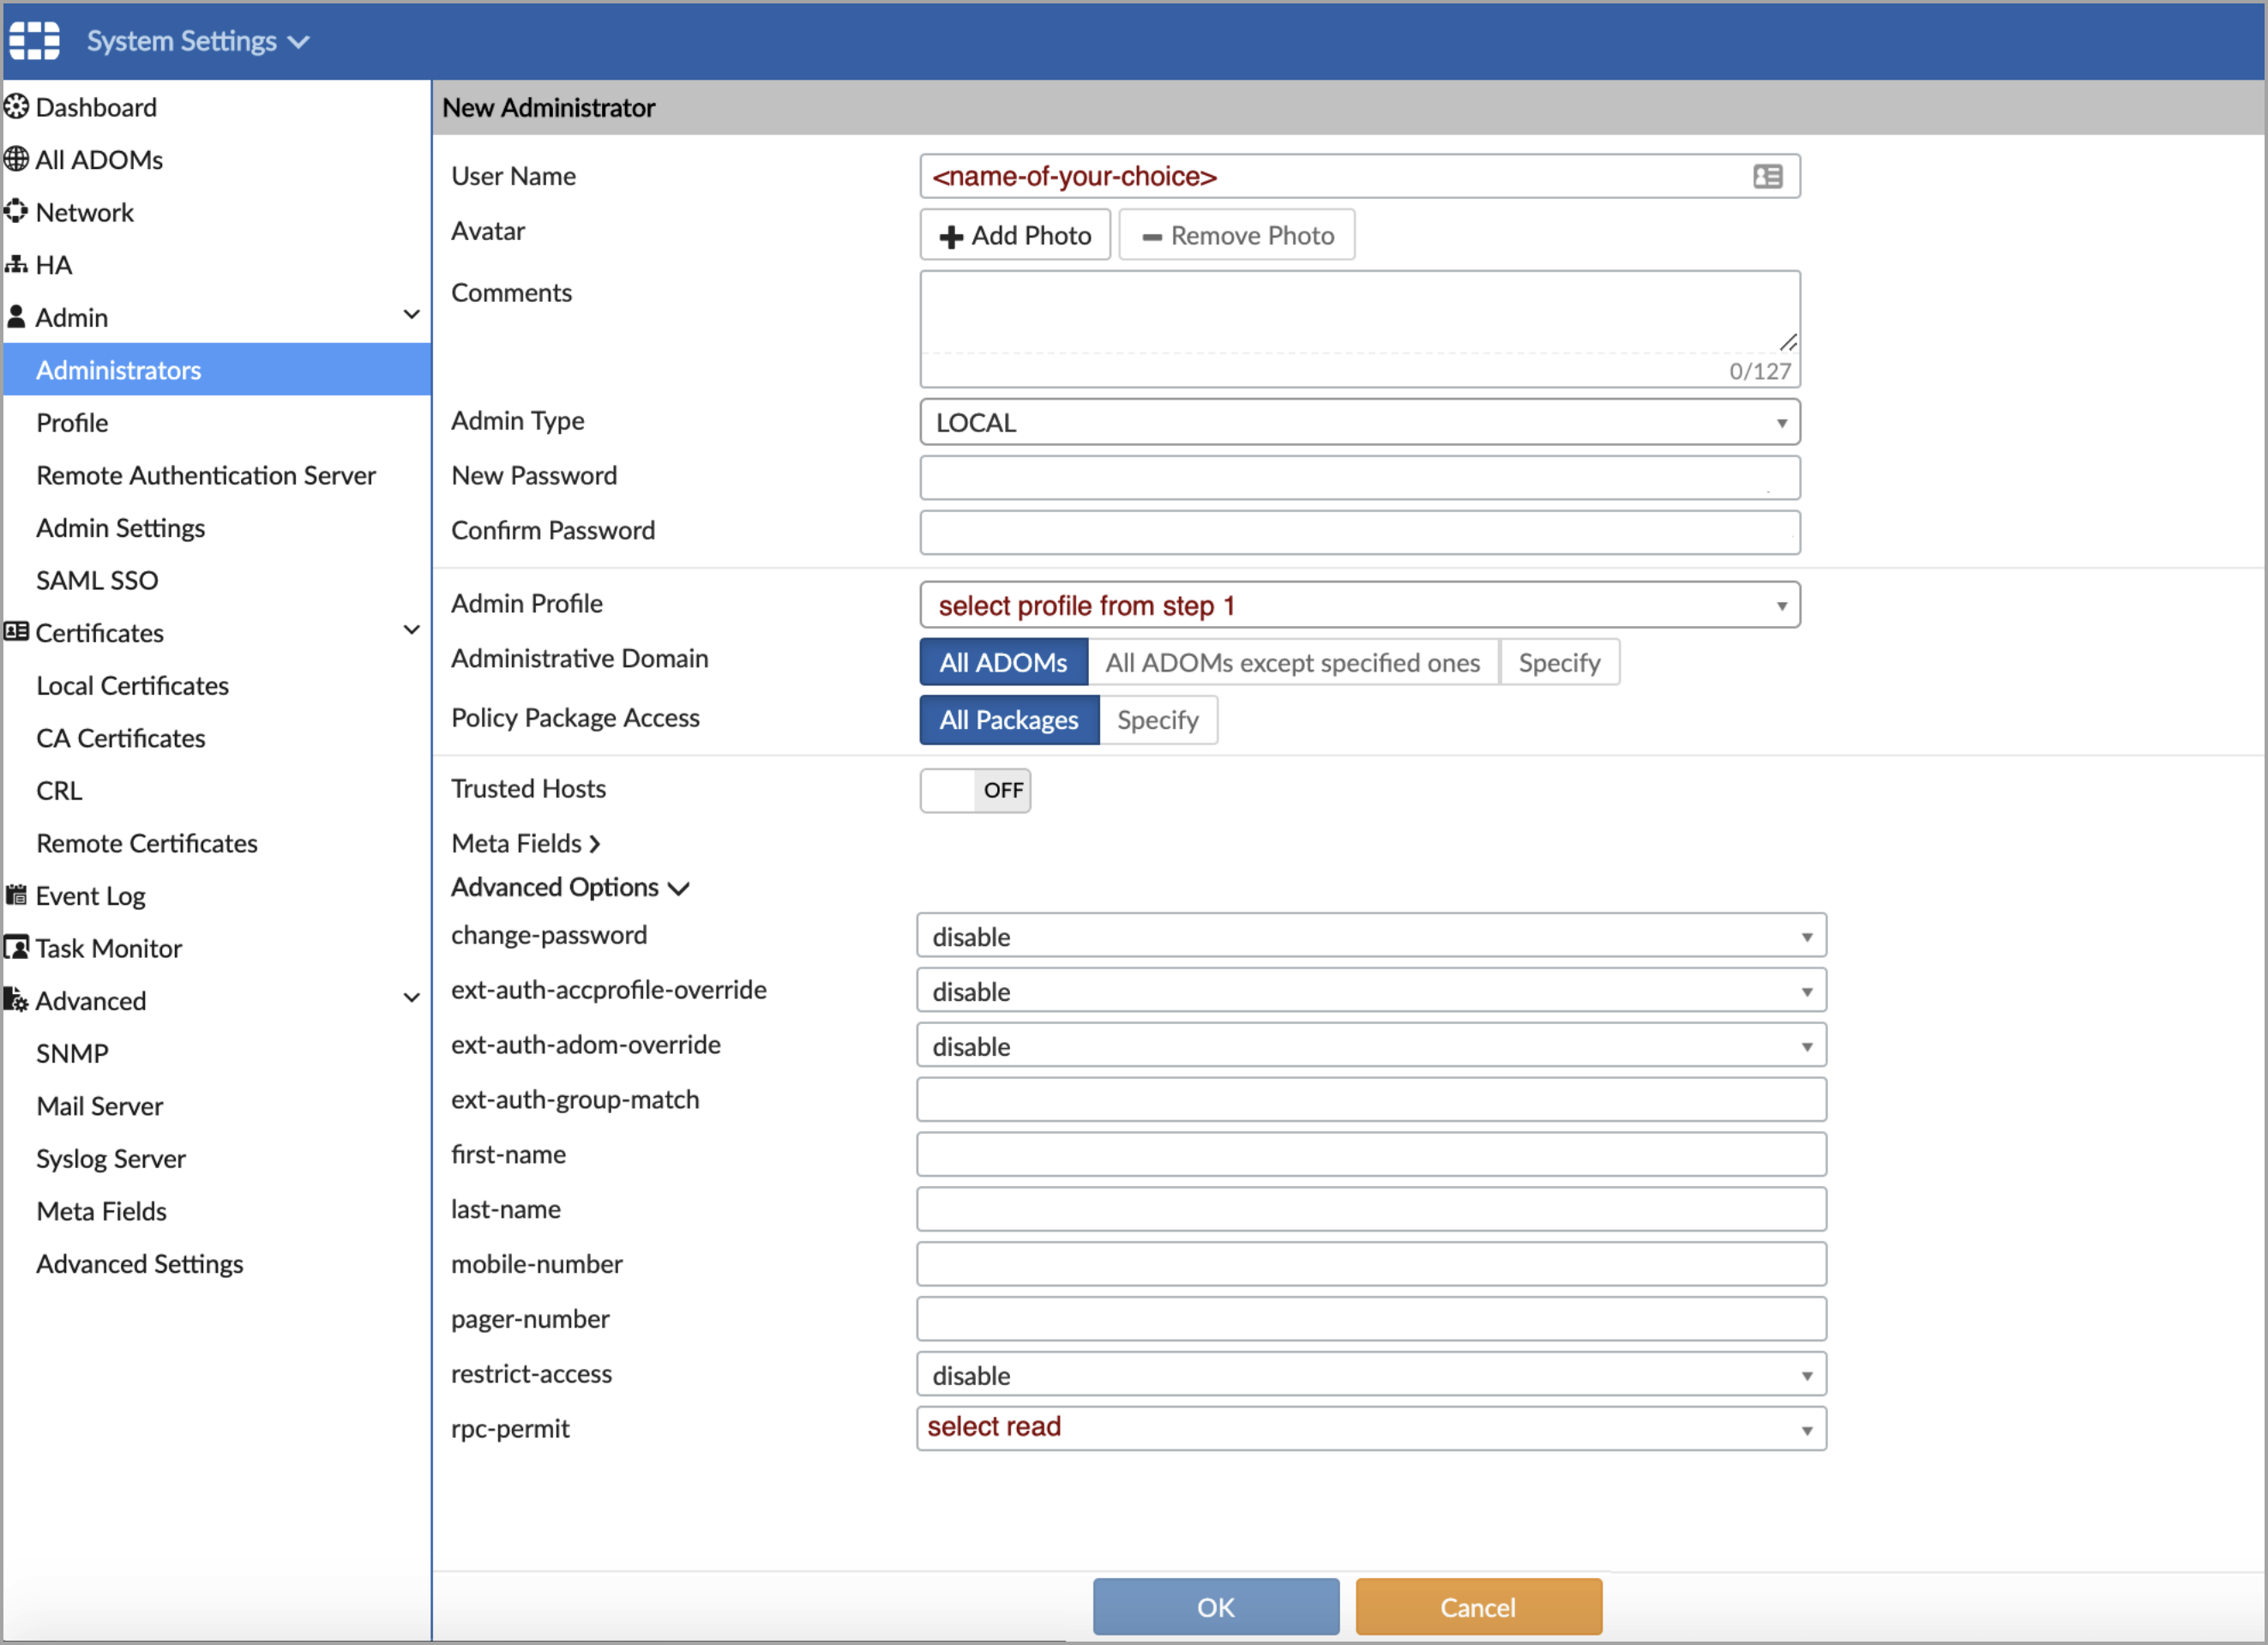
-
Click OK.
Generating the FortiOS API Key (Optional)
If you authenticate with a FortiOS API Key, you need to create a profile that only has read access to the firewall address permission group.
-
In the FortiGate GUI, select System
>Admin Profiles>Create New. -
Select at least read permissions for:
- User/Device
- Firewall
- Policy
- Address
- Schedule
- Network
- System
- VPN
- WiFi and Switch
-
Click OK.
-
Back in the FortiGate GUI, select System
>Administrators>Create New>REST API Admin. -
Populate the fields as shown below:
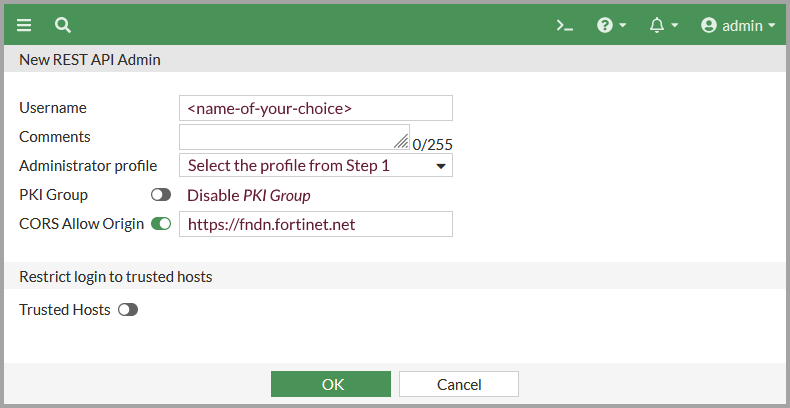
In 6.4.2 and earlier, the Trusted Host must be specified to ensure that your local host can reach the FortiGate. For example, to restrict requests as coming from only 10.20.100.99, enter 10.20.100.99/32.
-
Click OK and an API token will be generated. The API token as it is only shown once and cannot be retrieved. It will be needed for the rest of the process.
-
Click Close.
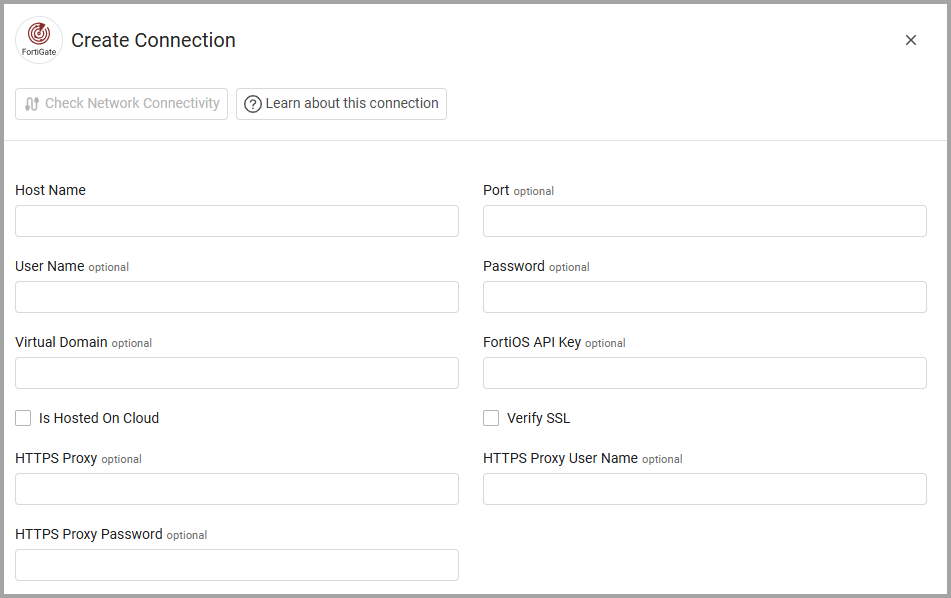
Deploying the Adapter in Axonius
- Host Name - The hostname or IP address of the Fortinet FortiGate server.
- Port - If not supplied, Axonius will use TCP port 443.
- User Name and Password - The credentials for a user account that has the Required Permissions to fetch assets.
-
Note:
As of FortiGate 7.6.6 FortiGate supports only token-based authentication for API calls. Token-based authentication requires the administrator to generate a token, which is then included in each API request for authentication. A token (the FortiOS API Key) is automatically generated when a new API administrator is created in FortiOS.
-
- FortiOS API Key (optional) - An API Key associated with a user account that has the Required Permissions to fetch assets.
Note
For FortiOS connections only:
- User Name and Password are required when FortiOS API Key is not supplied.
- When FortiOS API Key is supplied, User Name and Password are not required, and authentication should be attempted using the Bearer Token.
Optional Parameters
- Virtual Domain - Specify a comma-separated list of Virtual Domains (VDOMs) so that .Axonius will fetch data from specified virtual domains.
- Is Hosted on Cloud - Select this option when Fortinet FortiGate is hosted on Cloud.
- Verify SSL - Select whether to verify the SSL certificate of the server against the CA database inside of Axonius. For more details, see SSL Trust & CA Settings.
- HTTPS Proxy - Connect the adapter to a proxy instead of directly connecting it to the domain.
- HTTPS Proxy User Name - The user name to use when connecting to the value supplied in Host Name or IP Address via the value supplied in HTTPS Proxy.
- HTTPS Proxy Password - The password to use when connecting to the server using the HTTPS Proxy.
To learn more about common adapter connection parameters and buttons, see Adding a New Adapter Connection.
Advanced Settings
Note
Advanced settings can either apply to all connections for this adapter, or to a specific connection. Refer to Advanced Configuration for Adapters.
- DHCP lease time (seconds) (required, default: 604800) - Specify the DHCP lease time, that refers to the life of an IP address remains assigned to a device.
- Interfaces exclude list (optional) - Specify a comma-separated list of Fortinet FortiGate interfaces so that the adapter will only fetch devices that are not associated with the specified interfaces.
- VMware Interfaces exclude list (optional) - Specify a comma-separated list of Fortinet FortiGate interfaces so that the adapter will only fetch virtual devices that are not associated with the specified interfaces.
- Do not fetch OS Type field (optional) - Select to exclude fetching data from the OS Type field.
- Allow IPSEC VPN devices - Select to allow fetching IPSEC VPN devices.
- Use Fortigate new OS version parser - Select this option to fetch the OS minor version from another field on a FortiOS device instance.
- Fetch firewall rules - Select this option to fetch all the firewall rules, as well as their policies and addresses.
- Maximum number of chunks (default:50) - Enter a number to set the maximum number of parallel chunks to fetch information from the ADOMs. This can be a value between 50 and 100. Select the number of parallel calls that works best with your system.
- Fetch VPN SSL Sessions as Devices - Select this option to fetch VPN SSL sessions as Devices.
Note
For details on general advanced settings under the Adapter Configuration tab, see Adapter Advanced Settings.
Supported From Version
Supported from Axonius version 4.5