
BitSight Security Ratings
BitSight Security Ratings are a data-driven and dynamic measurement of an organization’s cybersecurity performance.
| Attributes | Axonius Cyber Assets | Axonius SaaS Applications |
|---|---|---|
| Service Account Required? | Yes | Yes |
| API Key Required | Yes | Yes |
| API Key Permission | Read access to devices | Admin |
| Service Account Permissions | User | Admin |
| Required Adapter Fields | BitSight domain, API Key | BitSight domain, API Key |
| Assets Fetched | Users | SaaS data |
Asset Types Fetched
- Devices, Users, Aggregated Security Findings, Groups, SaaS Applications, Domains & URLs, Certificates, Roles
Before You Begin
Required Permissions
- For accounts with Axonius Cyber Assets: Read access to devices
- For accounts with Axonius SaaS Applications: The BitSight user must be an Admin. For more information, see Creating a User in BitSight.
Setting Up the Integration
Creating a User in BitSight
-
Log into the BitSight admin panel as Administrator.
-
Navigate to Settings
>Manage Users.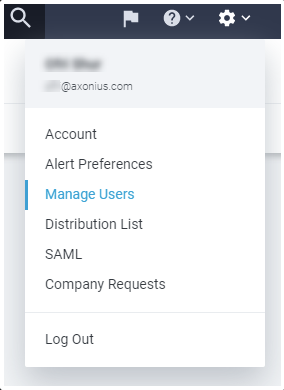
-
Create a new user:
- If you have Axonius SaaS Applications, from Roles, select Admin.
- Otherwise, the adapter requires the least-privileged type of user, which is the User role.
.png)
-
Once added, you should receive an approval email from BitSight to the specified mail address.
-
Click the attached link to set a new password of at least 32 characters.
Creating an API Token
-
Navigate to Settings
>Account. -
Scroll down to API Token and click Generate New Token.
.png)
-
Copy the generated token.
-
In Axonius, paste the copied token into the API Key field.
Connecting the Adapter in Axonius
Required Parameters
-
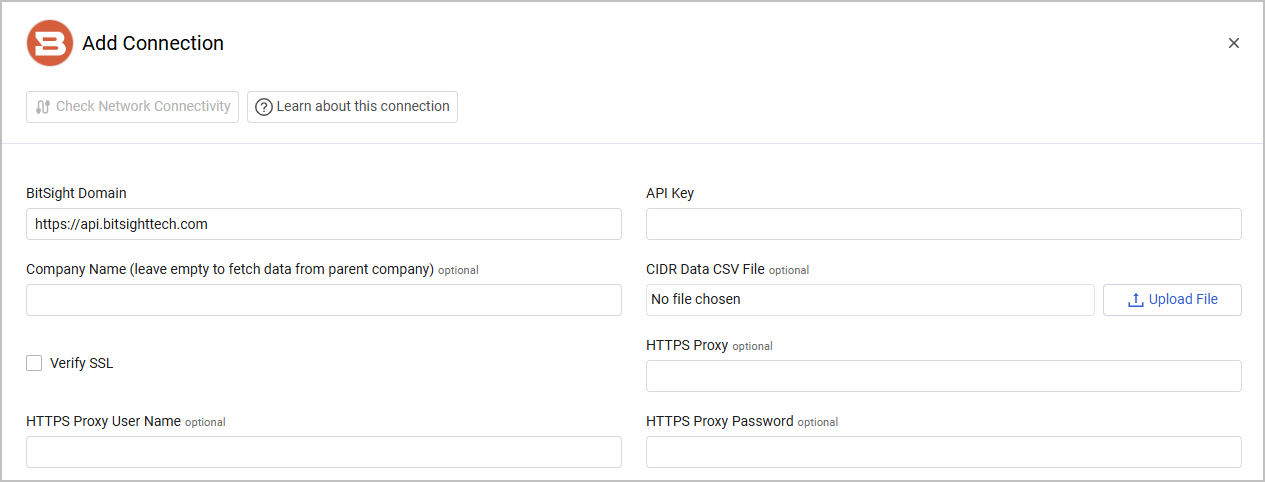
BitSight Domain (default:
https://api.bitsighttech.com) - The hostname or IP address of the BitSight server. -
API Key - An API Key associated with a user account that has the Required Permissions to fetch assets.
Optional Parameters
-
Company Name (leave empty to fetch data from parent company) - Specify a company name to only fetch data associated with that company.
-
CIDR Data CSV File - Upload the .csv file with your CIDR data. This is a CSV file that allows adding data for a specific IP CIDR range. The CSV file should contain the following columns, "CIDR Block", "Country", "Attributed To", "Source", "AS Number". If an IP address is contained in the CIDR block in the CSV file, the values from the other columns in this file are applied to the device.
-
Verify SSL - Select whether to verify the SSL certificate of the server against the CA database inside of Axonius. For more details, see SSL Trust & CA Settings.
-
HTTPS Proxy - Connect the adapter to a proxy instead of directly connecting it to the domain.
-
HTTPS Proxy User Name - The user name to use when connecting to the value supplied in Host Name or IP Address via the value supplied in HTTPS Proxy.
-
HTTPS Proxy Password - The password to use when connecting to the server using the HTTPS Proxy.
To learn more about common adapter connection parameters and buttons, see Adding a New Adapter Connection.
Advanced Settings
Note
Advanced settings can either apply to all connections for this adapter, or to a specific connection. Refer to Advanced Configuration for Adapters.
- Use My Company Only if company name is missing (default: true) - Select whether to automatically use the name of your organization for this adapter if no name has been manually set.
- Fetch observations - Select to fetch observations data, including vulnerabilities and company findings. This setting is enabled by default; Disable it when you only want to fetch company assets and infrastructure changes without observations data.
- Fetch vulnerabilities and company's findings - Select this option to fetch vulnerabilities detected in BitSight.
- Fetch only findings that affects rating - Select to fetch only findings that have an impact on the letter grade.
- Fetch company assets - Select this option to fetch company assets.
- Fetch infrastructure changes - Select this option to fetch infrastructure changes.
- Fetch company security ratings - Select to fetch latest company security rating for each company and add it to the device.
- Parse Asset Name and Host Name from Domain - Select to fetch and parse devices' Asset Name and Host Name from the domain.
- Fetch devices from X days ago - Specify a number of last days to fetch devices from.
- Filter Assets by Importance Category - Use this setting to limit company asset fetch to specific importance levels, based on BitSight's asset classification. If you leave this field empty, all company assets will be fetched.
- Parse non-CVE vulnerabilities - Select to include vulnerabilities that are not identified by the CVE identifier in the fetch. When this setting is not enabled only vulnerabilities with CVE identifiers are parsed.