Creating a Risk Score
The left navigation panel of the Axonius Risk Score page lists all assets to which you have created at least one Risk Score. Under each asset type, all Risk Scores defined for this asset are listed.
To add new Risk Score, follow these steps:
Basic Setup
-
From the left navigation panel, click + Add Risk Score.
-
In the Add Risk Score dialog:
-
Select the Score Type - per Asset or per Security Finding.
- Per Asset - This Risk Score is calculated for the selected assets only, and is based on values from at least two parameters. The results are written into the Axonius Risk Score field on the relevant Assets Page. For example - Risk Score for the device with the host name
hostname_example. - Per Security Finding (per Asset) - This Risk Score is calculated for a specific Security Finding in the context of a specific asset. For example - Risk Score for CVE number CVE-1234-XXX that is detected on the the device with the host name
hostname_example.
- Per Asset - This Risk Score is calculated for the selected assets only, and is based on values from at least two parameters. The results are written into the Axonius Risk Score field on the relevant Assets Page. For example - Risk Score for the device with the host name
Guidelines for calculating per Security Finding Risk Score
When calculating a per Security Finding Risk Score:
-
The query selected must include at least one asset that has an associated vulnerability.
-
We strongly recommend to include at least one Axonius field from the Security Findings module and not from the asset itself. Otherwise, the calculation might fail or provide false results.
- The Security Findings field should include attributes related to the vulnerability itself - CVE Severity, CVSS Score, etc.
-
The Risk Score result is written simultaneously into the following pages and fields:
- On the Assets page, the Risk Score appears under the Security Findings Instances: Axonius Risk Score field, available from the Security Findings Instances table.
- On the Security Findings page, the Risk Score appears under the Axonius Risk Score field. This refers to the risk score of the asset itself, and since each Security Finding represents a specific vulnerability on a specific asset, it is the same as the per Security Finding Risk Score.
See Viewing Risk Score Results for detailed instructions on how to view the calculation results from each Assets page.
-
Select an asset type to apply this Risk Score to (you can only select one).
-
Use template configuration as default - Check this option to create a Risk Score based on the template of this asset type's OOTB Risk Score. Since this is a custom Risk Score, you can edit the template, unlike Axonius-generated OOTB Risk Scores that cannot be edited.
Note
OOTB Risk Scores are currently supported only for Risk Scores per Device or per Security Finding per Device.
-
Click Add.
-
-
The new Risk Score is added under the relevant asset type in the left navigation panel.
Note
At this point, the Risk Score's name is something generic such as "Calculate Risk Score 1". To rename it (recommended), click the ellipsis menu of this Risk Score and then click Rename Risk Score.
Note
Axonius also offers Out-of-the-Box Risk Score which provides distinct, best-practice starting points through predefined values. You can use this Risk Score instead of or in addition to creating new ones. Learn more about Out-of-the-Box Risk Score.
Selecting Parameters
- From the Select Query dropdown, select the specific assets this Risk Score applies to.
- Under Score Calculation, select the parameters you want to include in the score calculation. Click
+to add more parameters. You can include an unlimited number of parameters (two is the minimum), provided that the sum of their weights (Total Percentage) is exactly 100. The more parameters included, the more factors the Risk Score takes into consideration. There are two possible types of parameters:- Asset Field - Select a specific Axonius field to use in the calculation. For example (for Devices): Host Name, Last Seen, Total CVE Count, etc. Then, from the Adapter dropdown, select the adapter from which to fetch the field value.
- Query Condition - This parameter is calculated based on the existence or absence of the asset from a specific query. The logic is as follows: If the asset exists in the selected query, assign Value A; Else, assign Value B. Select a query from the dropdown or click + Add Query to create a new query.
- For each parameter, under the Weight column, type or use the Up/Down arrows to set the percentage of this parameter in the Risk Score calculation.
Note
The Total % appearing under the Weight % column must be 100. If it's above or below 100, the system warns you accordingly.
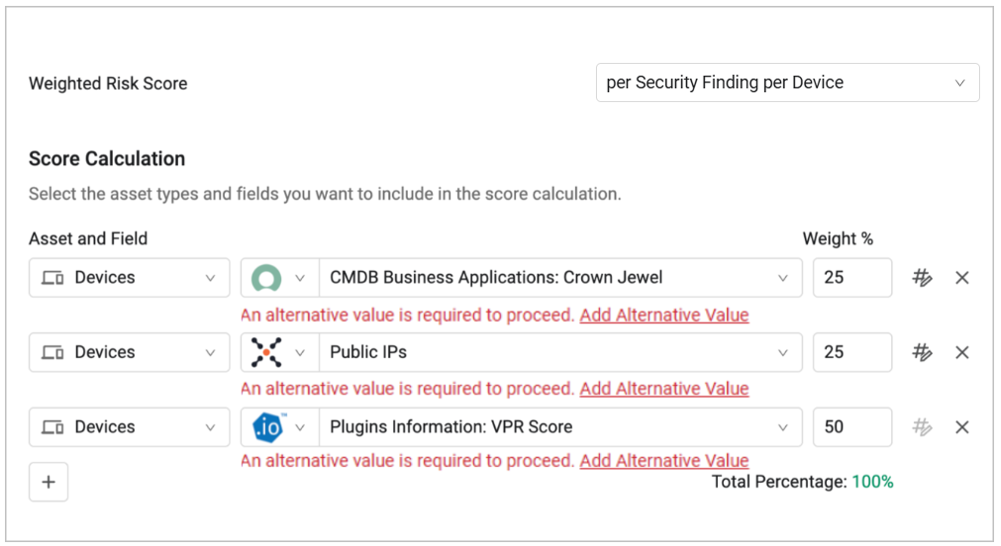
The following example shows a Risk Score per Security Finding (per Device), calculated by the weights of three different Axonius fields: CMDB Business Applications: Crown Jewel (fetched from the ServiceNow adapter); Public IPs; and Plugins Information: VPR Score (fetched from the Tenable.io adapter).
Normalizing Field Values
To ensure consistent Risk Score ranges and prevent dashboard misalignment, Axonius applies a specific normalization logic based on the calculation method and input field types:
| Calculation Method | Input Type | Normalization Logic |
|---|---|---|
| Per Security Finding | Numeric fields | Values are normalized to a 0–10 range. |
| Non-numeric fields, Query Conditions | Values are assigned an alternative value between 0–10. | |
| Per Asset | Numeric fields | Values are normalized to a 0–100 range. |
| Non-numeric fields, Query Conditions | Values are assigned an alternative value between 0–100. |
All inputs must be scaled and normalized before the final score calculation. However, in some cases, when the selected field isn't pre-normalized by Axonius (for example, a custom field that you created), the system will not force you to normalize the input data; nevertheless, the output values will still be automatically normalized to a range of 0-10 or 0-100.
All fields must be assigned at least one alternative value and at least one fallback value (a default value to be assigned in case none of the conditions are met). If no fallback value is assigned, the fallback is automatically set to 0.
For each condition (parameter) you add to Score Calculation, the system requires you to normalize the data. To do so, click the Edit  icon from the relevant row. For example:

Attention
If Risk Score Normalization is enabled in your environment, any Risk Score that are not aligned with the normalization rules and will fail when you run it. To keep implementing this Risk Scores across your data, delete it and configure a new one.
The process of normalizing/assigning alternative values to parameters differs between numeric and non-numeric fields.
When the field has a non-numeric value:
- In the data normalization wizard, expand the Value Configuration section.
- Fill in the IF row (the first condition) to assign a numeric value between 0-10 or 0-100 to the field. If you provide a value that is not within that range, the system automatically normalizes it back to 0 or 10/100.
- Optionally, click + Add Condition to add more ELSE IF conditions.
- In the bottom ELSE section, enter a fallback value. This value will be used if the field doesn't exist or doesn't meet the conditions.
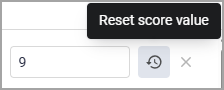
- The default fallback value is 0. If you define a different value, you can click Reset score value to reset it back to 0.
- Click Apply.
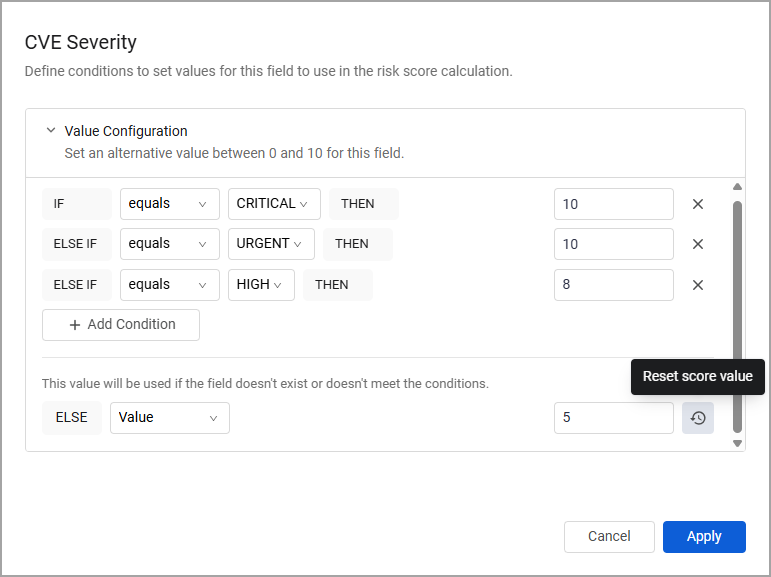
For example, if we add the CVE Severity field, we can define the following conditions:
-
If this field's value is either CRITICAL or URGENT, the Risk Score will be 10.
-
If this field's value is HIGH, the Risk Score will be 8.
-
If this field's value is anything else, the Risk Score will be 5.
Important Guidelines:
- Defining the conditions is done using standard Axonius query operators. The available operators change according to the field type - string, boolean, enum, etc. For example, if the selected field is Software Name, the condition row contains additional operators such as "starts" and "ends".
- In case a single field has multiple values, the calculation assigns the numeric values based on the order in which the conditions were set. Therefore, based on the previous example, if we have a CVE Severity field that contains both CRITICAL and HIGH severities, its numeric value will be 10, because the CRITICAL condition was set first.
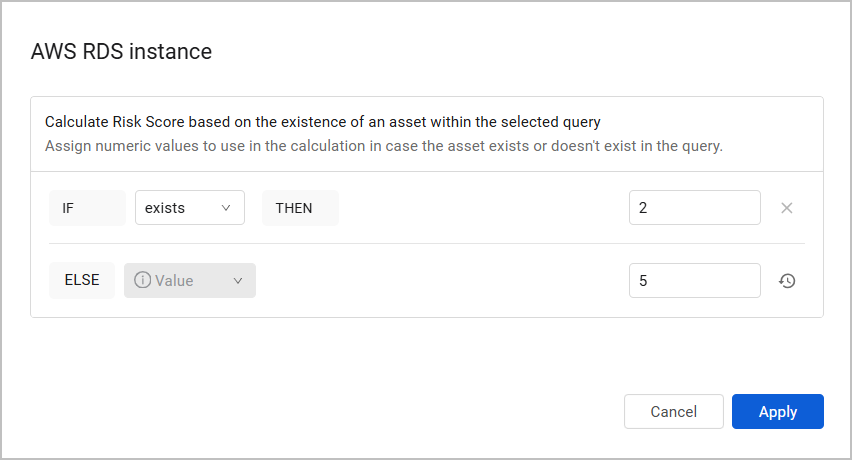
The same logic applies to Query Conditions: assign numeric values to use in the calculation in case the asset exists or doesn't exist in the query. Then, click Apply.
When the field has a numeric value:
When the field has a numeric value (CVSS Score, Device Count, etc.), an additional section titled Value Normalization appears in the data normalization wizard. In this section, fill in the following fields:
-
In case of multiple values, choose which one you want to display - Some fields might have multiple values, for example, if their values are fetched from multiple adapters. In this case, choose which value you want to use in the calculation: the Maximum (default), Minimum, Average, Median, or Sum value.
-
(Optional) Select an operator (× or ÷) and enter a value to adjust the Risk Score - Select a Multiply or Divide operator and enter a value to adjust the Risk Score by it. For example - divide the value by 10. This is useful when fields have very high values (100, 1000, etc.) or non-integer values, which might complicate the calculation.
Attention
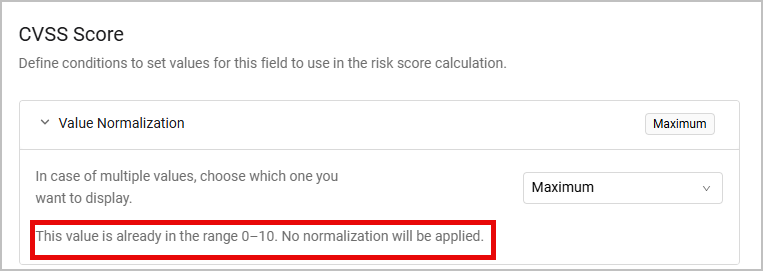
Some field values are pre-normalized by Axonius. For those fields, the option to select operators (multiply/divide) is unavailable. See, for example, the CVSS Score field:
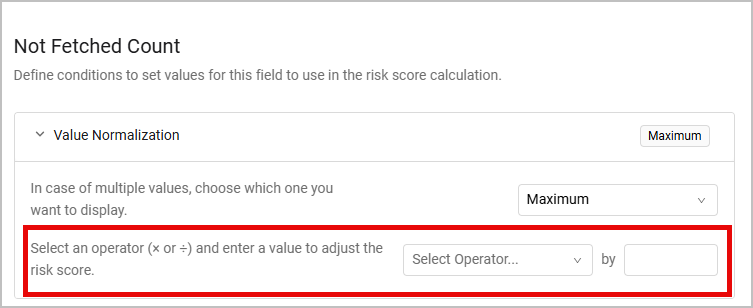
Compare to the Not Fetched Count field which is not per-normalized by Axonius:
The system limits any input value from exceeding 10/100 or dropping below 0. Therefore, no matter which operator and number you choose (for example - multiply by 200), the final calculated value will be normalized to be between 0 and 10/100.
Example - Normalizing Numeric Values
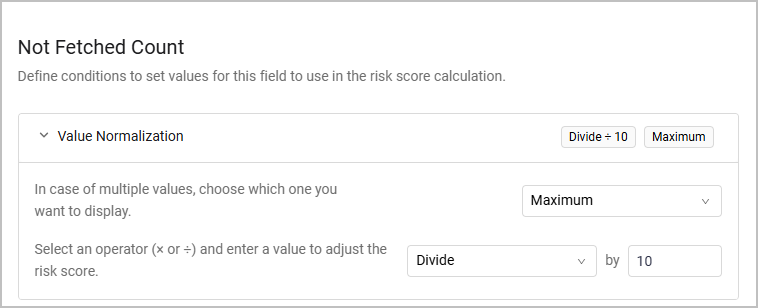
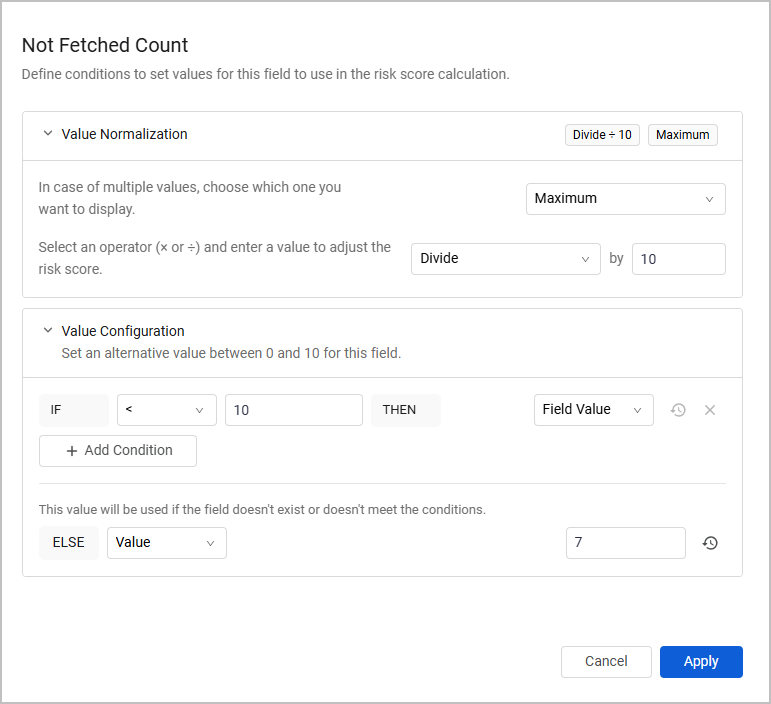
- Assume we want to normalize the Not Fetched Count field as follows: display the maximum value in case of multiple values, and divide the value by 10.
-
Assume that the Not Fetched Count field has the following values: 20, 30, and 50. According to what was defined under Value Normalization, the assigned Risk Score will be 5, because the calculation mechanism takes the maximum value (50) and divides it by 10.
-
After normalizing the data, proceed to the Value Configuration section and define conditions and a fallback value, as explained previously.
- For example: define that if the normalized value is smaller than 10, the Field Value will be used as the Risk Score. In any other case - when the value equals to or larger than 10 - an alternative value of 7 will be assigned.
-
Since 5 is smaller than 10, the Field Value 5 will indeed be the Risk Score.
Note that the conditions defined in this section are checked against the values defined in the previous step. For each condition, select whether to use the Field Value or set a different value.
Field-Based Fallback Conditions
Note
This section does not apply to Query Conditions.
The previous examples demonstrated how to configure numeric fallback values - Value-type fallbacks. However, you can also configure up to 2 Field-type fallbacks. The system will check these two fields sequentially, until it reaches the correct field value to use. If none of the fields matches the condition, a final Value-type fallback must be assigned.
Note
While you can configure up to 2 field-based fallbacks, you can only configure a single numeric fallback value for each condition.
To summarize the two possible flows:
Flow 1 - Value-type Fallback
- The system checks the value of the calculation field defined.
- If the value doesn't match the required condition(s), the system assigns this field a defined numeric value.
Flow 2 - Field-type Fallback
- The system checks the value of the calculation field defined.
- (Optional) If the value doesn't match the required condition(s), the system checks the value of a second field.
- (Optional) If the value doesn't match the required condition(s), the system checks the value of a third field.
- If the value doesn't match the required condition(s), the system assigns this field a defined numeric value.
Guidelines for setting field-type fallbacks
Each step can contain multiple sub-conditions. Click +Add Condition to add expressions for each step.
To have the system use the field value instead of a custom value, click Reset score value.
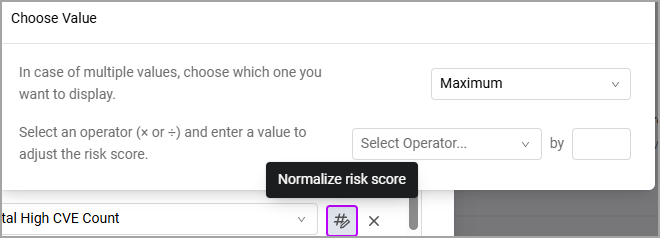
If the field has a numeric value, you can normalize its data using operators, as demonstrated previously. Click Normalize risk score to display the data normalization dialog.
If the field has a non-numeric value, the Normalize risk score button won't be available, and you will only need to assign it a custom numeric value.

Example for Flow 2 - Field-type Fallback
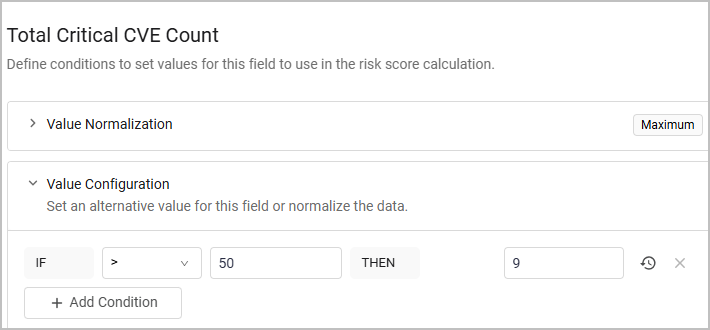
We want to use a Device's Total Critical CVE Count field value in the Risk Score calculation. Instead of setting a numeric fallback value straight away, we can set the system to move on and check the value of the Total High CVE Count field, and then move on and check the value of the Total Medium CVE Count field.
In case none of these fields meet the defined conditions, we will set a final, numeric fallback value to use in the calculation.
-
To start the process, click Edit Risk Score next to the field's row.

-
Set one or more conditions for the Total Critical CVE Count field.
-
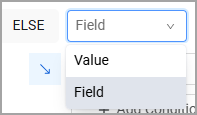
From the ELSE dropdown, select Field.
-
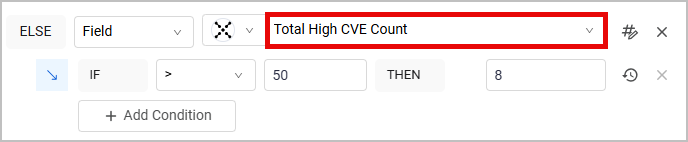
Select the Total High CVE Count field and set a condition for it.
-
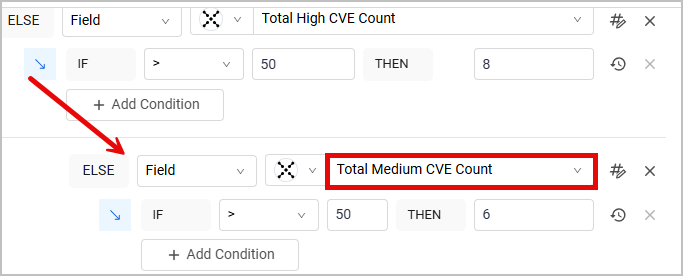
From the next ELSE dropdown, select Field again. Then, select the Total Medium CVE Count field and set a condition for it.
-
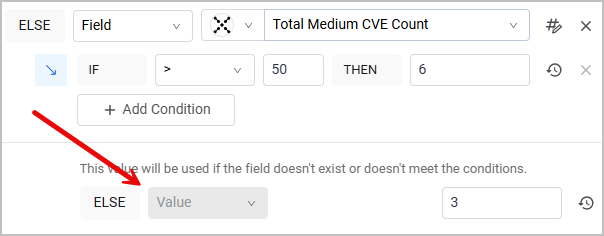
You've reached the maximum number of fallback fields that can be set. Now, the final ELSE dropdown only allows you to select Value and set a numeric value. This step is mandatory to complete the process.
-
Click Apply to save your changes.
You can come back to each calculation field and edit its conditions by clicking the Edit
 icon.
icon.
Defining Risk Levels
Axonius divides ranges of Risk Scores into levels. A Risk Level is a translation of a Risk Score's numeric value to one of the following strings: Low, Medium, High, or Critical. For example, Axonius' default settings are that Risk Scores between 0.01 and 3.99 are Low level; Risk Scores between 4 and 6.99 are Medium level; and so on.
The Risk Level section is available at the bottom of the Risk Score page, right after selecting parameters.
Each Risk Level row contains two fields. The left field represents the lowest number in the range and the right field represents the highest number in the range. The ranges are set to the Axonius default, but you can change them according to your needs.
Attention
The Risk Level field is not automatically populated for old Risk Scores (created before the introduction of Risk Levels). To apply Risk Levels on these Risk Scores, you must open, save, and run each of them at least once. Alternatively, you can save your custom Risk Levels as default and apply them on both existing and new Risk Scores from the Risk Score Settings page.
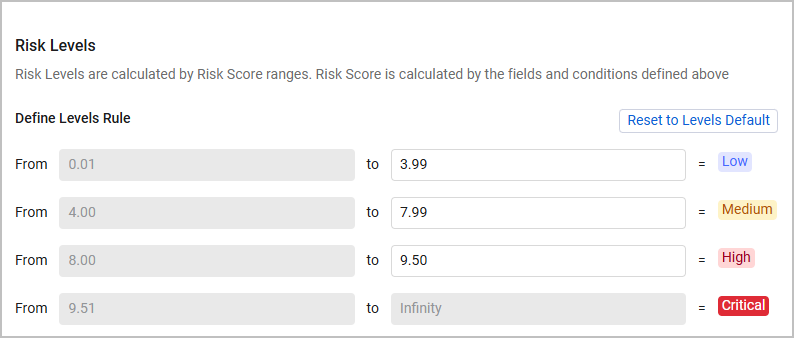
Guidelines for Defining Risk Levels
- The left field of the Low level row always has the value 0.1 and can't be edited.
- Each left field automatically receives its value from the right field on the previous row, so no gap between the ranges is possible.
- For example, if the value of the right Low field is 4.5, then the value of the left Medium field is set to 4.51; if you change the value of the right Low field to be 4.51, then the value of the left Medium field changes to 4.52.

- The right field of the Critical level row always has the value infinity; so, in fact, the range of the Critical level is driven by the ranges of the former levels and doesn't need to be manually set.
- To return to the Axonius default settings, click Reset to Levels Default.
- To save the custom Risk Score ranges you defined, you must save your changes before exiting the page. Otherwise, the ranges and levels will be reset to the Axonius default.
Note
When the Risk Score Level results in 0 in the final calculation, the value of Axonius Risk Level is None.
Saving Custom Risk Levels as Default
To avoid defining custom Risk Levels for every new Risk Score created, you can save the custom ranges you defined as default.
- Click Risk Score Settings from the top right corner of the page.

- Edit the default ranges according to the guidelines.
- Select whether to apply this default only on future Risk Scores, or on both existing and new Risk Scores.
- Click Save.
Activating and Deactivating Risk Scores
Each Risk Score has an Active Risk Score toggle, enabled by default. You can enable or disable it according to your needs. Inactive Risk Scores are greyed out: