Saved Queries
Any query created on one of the asset pages, with either the Query Wizard or in Basic mode, or by updating an existing query, can be saved. After you save it, it is added to the Saved Queries list and can be selected anywhere a query is used, such as in Enforcement Sets, Dashboard Charts, Reports, Data Analytics, and more.
Saving a New Query
The Asset pages display the query name above the search bar along with the query status. The query status indicates whether this is a new query that is unsaved, or a saved query that has been edited.
When you save a query, the following information is saved:
- Query filter – The collected assets together with their details according to the filter set.
- Query view – The columns that are displayed when you save the query are saved as part of the query and used to display the same “view” of selected fields in the table every time you use this query. Set the columns in Edit Columns.
Note
The “view” is saved as part of the saved query. It doesn’t impact the filtered asset data; only the data that is visible in the query results table.
To save a query:
-
After you create a query with either the Query Wizard or in Basic mode, above the left-upper corner of the asset list, click Save As.

The Save as a New Query dialog opens.
-
In Query name, enter a unique name for the query.
-
In Query description, enter a description (optional).
-
In Tags, choose a tag from the drop down list of tags available in the system or start typing to add a new tag. You can add as many tags as you need. When you add a new tag, click Add New to add the tag to the system. Use Clear All to remove a tag you selected. Tags help organize your queries. You can add a tag to a query when you create the query, as well as from the Saved Queries page. The list of tags used in queries is the same across the whole system. Tags are optional.
-
To create an Asset Scope query, enable Asset scope query. The query will be saved in the Asset Scope Queries folder and it can be used to create Data Scopes. If this option is enabled, the Access section is not displayed.
-
In Who has access, configure the access privileges for the query.
-
In Folder name, select the folder where you want to save the query. The folders available depend on whether the query is private or public.
- By default, public queries are saved in the folder of the current Data Scope.
- Queries accessible to all Data Scopes are saved in the Shared Queries folder.
- Private queries are saved in the My Private Queries folder.
-
Click Save.
Note
If you have written a query in AQL using terms or expressions not supported in the Query Wizard, when you save the query the system informs you that the system will save the query as an AQL expression.
Running a Saved Query
Once a query is saved you can run it from the Queries page, from the Saved Query drawer or from the Saved Queries list in the Query Search Bar.
Saved Queries List in the Query Search Bar
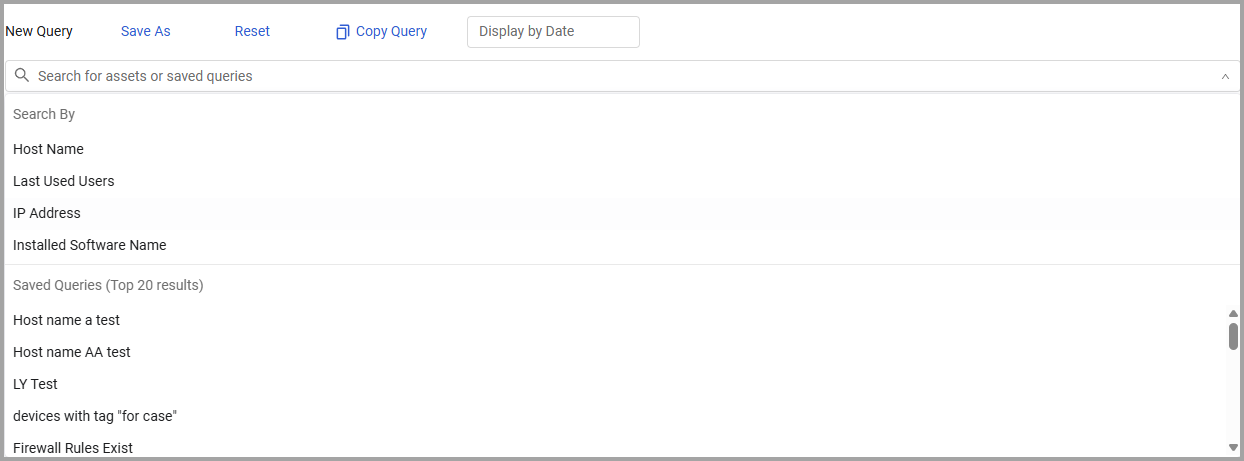
In an Asset page, click the Query Search bar. The drop-down list displays a list of saved queries and history of the queries run in Axonius. To run a saved query, use the vertical scroll to select the saved query you want. Then click it to run the query.

Updating an Existing Saved Query
After you select a saved query, you can do the following:
- Save As - Save the query results as a new saved query.
- Update Query - Select from the Saved As drop-down to update the saved query you are working on.
- Copy Query Link - Select from the Saved As drop-down to copy the link to the query and then share it with others.
- Reset - Reset the page to its default column view and with no filtering, resulted in all devices/users being displayed.
- Copy Query - Generate a query URL. See Sharing a Query Wizard Expression (URL) below for more information.
- EC Actions - Use a quick Enforcement Action to add tags or custom fields to all assets returned by a query. In addition, you can create a case set from the EC Actions drop-down. See Adding Tags to Query or Filter Results with a Quick Enforcement Action and Adding Custom Fields to Query or Filter Results with a Quick Enforcement Action for more information.

Sharing a Query Wizard Expression (URL)
Another way to save a query is to generate a query URL. The generated link opens the Query Wizard with all the query details populated - assets, fields, data refinement, etc. The link acts as a temporary saved query and is available for 30 days.
To generate a query URL
- Define a query using the Query Wizard and click Search to run it.
- Click the Copy Query button above the asset table.

- A "Query Link copied to clipboard" message pops up.
- To open the query URL, paste the copied link into the address bar and press Enter.
- The Asset page that opens shows the results of the copied query.
Accessing Saved Queries from the Assets Page
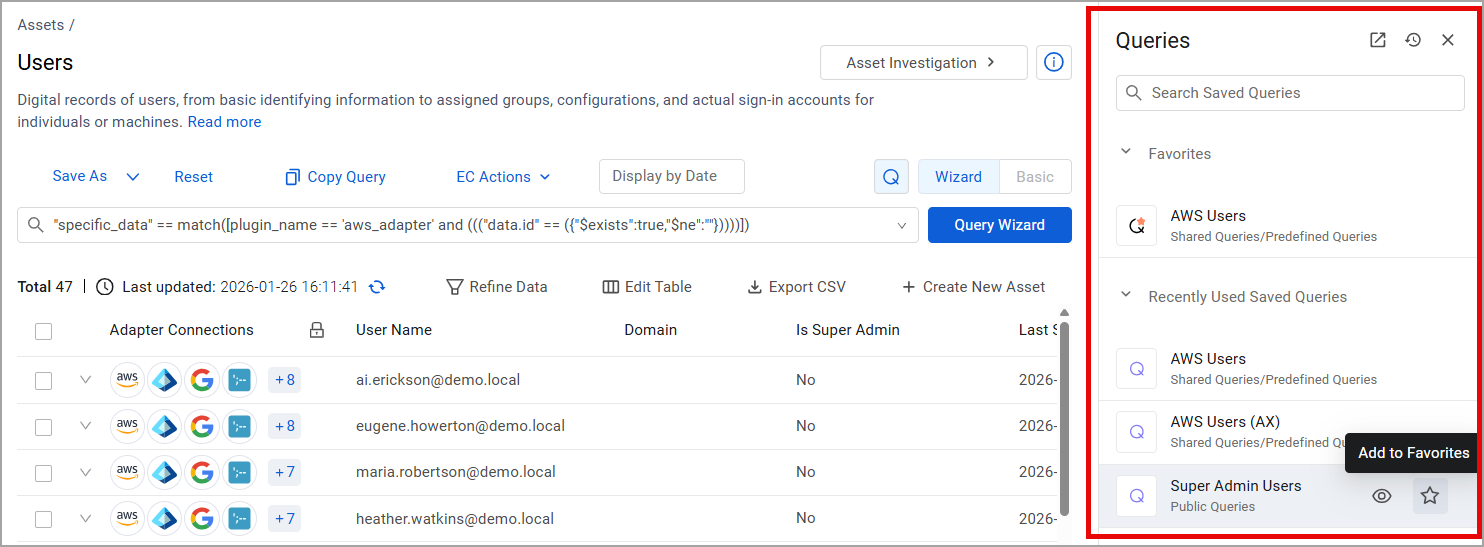
From each Assets page, you can access information regarding the saved queries run on this asset type. To get started, click the Queries button, located above the Assets page's search bar.

The Queries pane opens on the right and displays the Recently Used Saved Queries. Use the search bar to search for saved queries. You can also add a saved query to your Favorites for quick access.
Click a saved query to instantly run it on the Assets page.

Updated 9 days ago
