
Installing Axonius Gateway
Configuring and installing the Axonius Gateway is required when there is no direct network connection between the adapters and the data sources, such as when the data sources are only accessible by an internal or segregated network . See also Managing Gateways.
Important
Axonius Gateway is not required when the adapter has a direct connection to the data source. For example, to connect adapters that are accessible to the internet for Axonius-hosted, or are connected to the same network as the Axonius primary node for Customer-hosted (on-premises or private cloud).
In the Axonius Federal (FedRAMP) hosted solution, a Gateway is always required.
All adapter communication must traverse an Axonius Gateway deployed within the customer’s authorized environment, regardless of where the data sources are hosted.
Deployment, installation and maintenance of the Gateway server, underlying OS and the Docker Engine are the responsibility of the customer. The Axonius Gateway can run on any Linux distribution that supports Docker/Podman.
The same gateway cannot be installed in more than one server. You must go through the steps below for each individual gateway so that each gateway has their own installation package.
Axonius Gateway establishes a link between an internal network and the primary Axonius instance, which may be an Axonius-hosted (SaaS) instance or a Customer-hosted (on-premises / private cloud) instance.
The Axonius-hosted (SaaS) instance resides in the cloud and is not part of your organization's internal network. Axonius securely fetches data from the organization's data sources, known as adapters. To connect to adapters that are accessible only via an internal or segregated network (for Customer-hosted (on-premises / private cloud)), you must configure and install an Axonius Gateway on a server that has access to those sources.
Note
The version of the gateway does not necessarily match the version of Axonius instances.
Gateway Installer Capabilities
The gateway installer has the following capabilities:
Available Commands
The gateway installer script supports multiple commands. To view all available options, run:
./install.sh helpCommon commands include:
help - Display available commands and usage information
uninstall - Remove the gateway from the server
Built-in Diagnostics Tool
The installer includes a built-in diagnostics tool to help troubleshoot gateway issues:
./install.sh diag      # Summary mode
./install.sh diag -v   # Verbose mode (detailed output)
The diagnostics tool checks container status, VPN tunnel connectivity, DNS resolution, and network connectivity. Results are automatically saved to the diagnostics/ folder within the gateway installation directory.
For example: /opt/axonius/axonius-T-1-xxxxx/diagnostics/diag_<timestamp>.txt).
The installer retains the last 10 diagnostic reports.
Health Monitoring
The gateway container includes built-in health checks that monitor VPN tunnel connectivity. You can view the container health status using docker ps or podman ps. A health status file is also written to the status/ folder for external monitoring integration.
Firewall Policy Detection
The installer detects restrictive firewall policies that may block gateway traffic. During installation, the script checks for:
- nftables chains with restrictive drop policies
- iptables INPUT/OUTPUT chains with DROP or REJECT policies
- iptables FORWARD policy (automatically adjusted to ACCEPT if needed)
If issues are detected, the installer displays a warning and gives you the option to continue or exit to resolve the issue manually.
Requirements for the Gateway Host
There are specific host-level configurations required for the Axonius Gateway to route traffic and maintain container networking. While the installation script attempts to configure these, you must ensure they remain active, especially if using utilities that periodically reset system configurations.
- IP Forwarding: The kernel setting
net.ipv4.ip_forwardmust be enabled and set to1. - Iptables Policy: The default FORWARD chain policy must be set to accept:
iptables -P FORWARD ACCEPT. - SELinux: Ensure that SELinux is set to either Disabled or Permissive mode.
- Container Networking: Docker and Podman create specific NAT rules required for gateway communication. These rules must not be modified or deleted.
Configuration Management WarningIf you use configuration management tools (such as Chef, Puppet, Salt, or Ansible), ensure your playbooks/recipes do not revert the
net.ipv4.ip_forwardsetting or theiptablesforward policy. Reverting these settings will cause the gateway to lose connectivity.
Setting Up a Gateway
To establish the link between the primary Axonius instance and an internal/segregated network, you need to:
- Provision a server to be used as the Gateway server
- Install Docker Engine on the Gateway server
- Add a new Gateway Connection
- Install the Gateway installation package
- Configure and connect adapters to use an Axonius Gateway
1. Provision a server to be used as the Gateway server
Provision a server that meets the following network requirements, either by a direct connection or by HTTPS proxy:
- Access to the internet via TCP port 443 from the Gateway server.
- Access to the sources of the adapters that will be connected using this Gateway.
- The folder
/opt/axoniusmust be writeable.
Note
If you are using the Palo Alto Networks firewall, you must use 'OpenVPN APP-ID' for destination port 443 in order to establish the Gateway. If you are using an IDS or DPI on your system, define the destination port protocol/profile as OpenVPN (and not HTTPS) in order to establish the Gateway.
The server hardware requirements are:
- An Intel x86_64-based architecture processor
- At least 1 GB of free disk space
- At least 1 GB of RAM dedicated to the Gateway container
Note
For added security, when running Axonius Gateway on an AWS EC2 instance, we recommend disabling version 1 of AWS' Instance Metadata API (IMDSv1), as Axonius Gateway is fully-compatible with IMDSv2.
2. Install Docker Engine on the Gateway server
Install any Linux distribution that supports either Docker or Podman container engines. Axonius recommends using Docker for Debian-based OS Distributions such as Ubuntu and using Podman for RHEL/CentOS distributions. However, the tunnel installation will detect and use whatever container engine is installed.
- Install a container engine (Docker or Podman).
- When using Docker as your container engine, ensure that it is started and enabled to run on boot:
sudo systemctl enable --now docker.
3. Add a new Gateway Connection
Gateway Uniqueness and Cloning
Each Axonius Gateway is assigned a unique cryptographic key upon installation. This identity is critical for maintaining a stable, encrypted tunnel to your Axonius instance.
Important: Do Not Clone Gateway VMs
Installing the same gateway script on multiple servers, or cloning a VM that already has a gateway installed, will result in connection flapping. Because both hosts will attempt to use the same cryptographic identity, they will repeatedly disconnect each other.
To deploy multiple gateways:
- Log in to the Axonius UI.
- Create a new gateway entry for each physical or virtual server.
- Download and run a unique installation script for each host.
Troubleshooting Identity Conflicts
If you have accidentally cloned a gateway or reused a script, you must uninstall the gateway from the cloned machine and perform a fresh installation using a new script generated from the Axonius console.
To add a new Gateway connection:
-
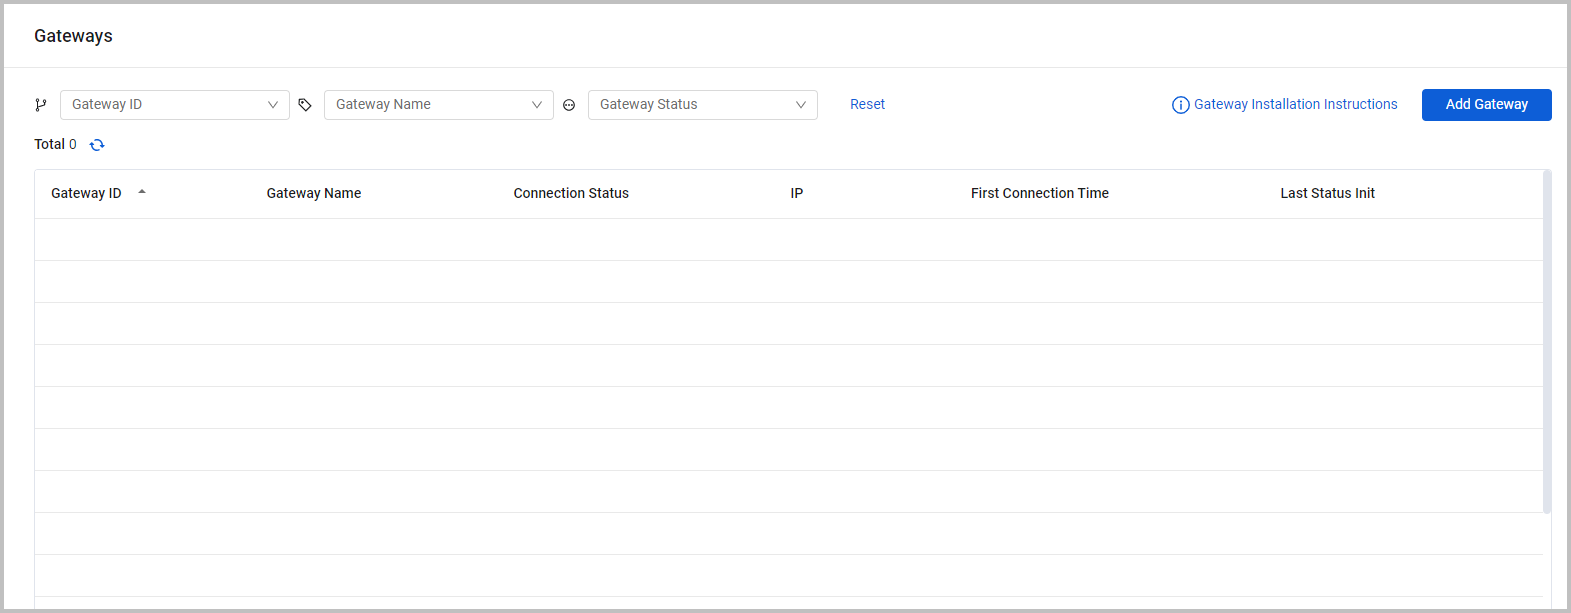
From System Settings, under the System category, select Gateways, the Gateways page opens.
-
On the Gateways page, click Add Gateway.
-
The New Gateway Connection drawer appears.
-
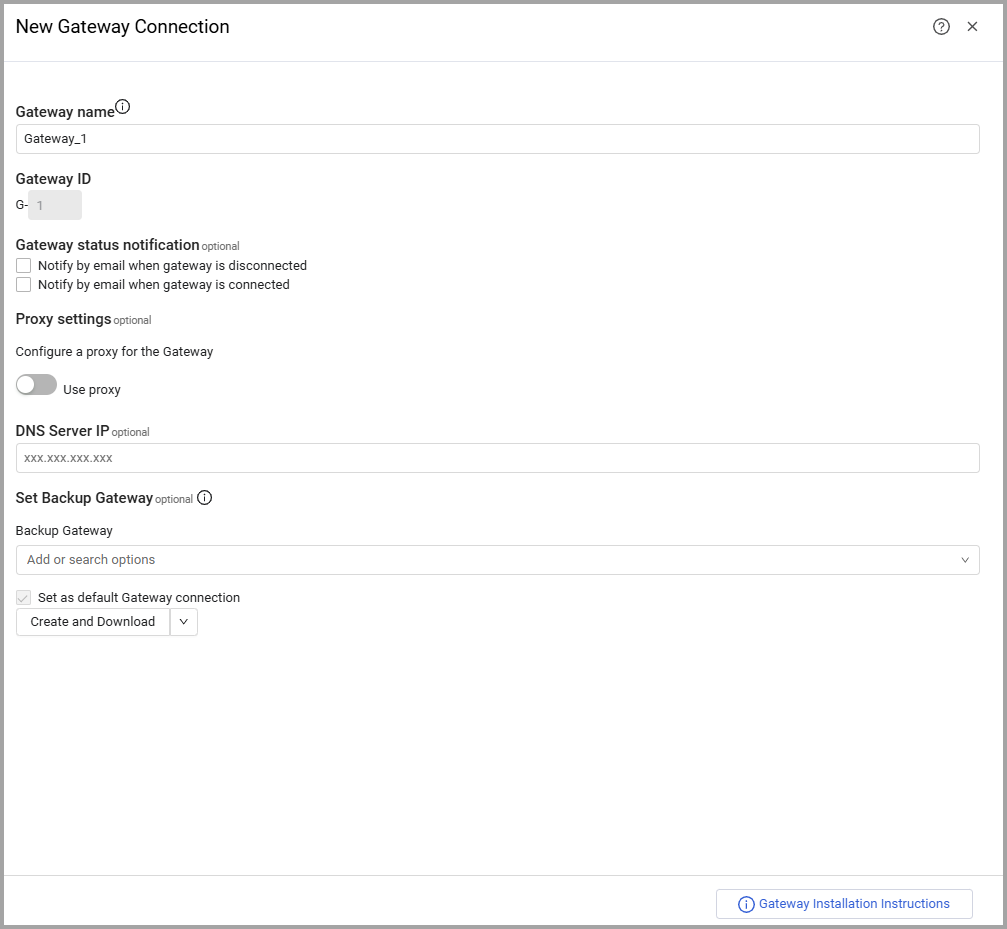
Specify the following Gateway settings:
-
Gateway name (default: Gateway_x) - Specify an indicative name for the Gateway connection or use the system default. The Gateway name can always be changed.
-
Gateway status notification
- Notify by email when gateway is disconnected
- Notify by email when gateway is connected
Choose one or both of these options to send email notifications to the recipients defined when a Gateway is disconnected or connected. When you choose one of the options, the Recipient Email Address field is displayed.
-
Recipient Email Address - Specify a list of email addresses to be notified when the Axonius Gateway disconnects or is connected, depending on the notification options that you chose.
Note
In order for the Gateway status notification emails to work, you must toggle on Send emails in Email Settings under External Integrations on the Settings page, and configure the email host and port. For more details, see Configuring Email Settings
-
Proxy settings (optional) - To configure a proxy service to be used by the Axonius Gateway, select the Use Proxy checkbox. Once enabled, configure the Proxy address and Proxy port fields. Proxy user name and Proxy password are optional fields for proxy services.
-
Set Backup Gateway - Under Backup Gateway, select one or more gateways in the list to act as backup gateways if the primary gateway is unavailable. If the primary gateway is down before an adapter fetch (or any gateway-related action) begins, the system automatically switches to the first gateway with a healthy state. For any existing gateway, you can define another existing gateway as a backup gateway. You can add a backup gateway to an existing gateway.
-
Set as default Gateway connection - When selected, this Gateway is used as the default.
-
DNS Server IPs - Enter the DNS servers to use. You can enter multiple addresses. Enter an address and press ENTER. If one server is unavailable, another configured server is used. You can enter up to 10 servers.
-
Set Backup Gateway
- Backup Gateway - Select a second gateway to use as a backup if the primary gateway is unavailable.
-
-
Do one of the following:
- Click Create and Download as OpenVPN config - The gateway is created, and the gateway package is downloaded to your download folder as an .opvn file.
- Click Create and Copy curl command - The gateway is created, and a curl command is copied to your clipboard. Replace
<YOUR_API_KEY>and<YOUR_API_SECRET>with the correct values. Run the command to download the gateway package.T-Xis the gateway number. The following is a sample curl command:
curl 'https://your-axonius-instance' -H 'api-key: <YOUR_API_KEY>' -H 'api-secret: <YOUR_API_SECRET>' -o axonius_gateway_launcher_T-X.sh4. Install the Gateway installation package
- Copy the Gateway installation package that you downloaded in the previous step to the Gateway server. This package contains all the configurations completed in the previous step, allowing the server to connect to Axonius.
- Execute the Gateway installation script. For example:
When the script finishes successfully, it displays the following message: “The Axonius Gateway has been successfully installed.”sudo chmod +x axonius_gateway_launcher_T-1.sh sudo ./axonius_gateway_launcher_T-1.sh - After the installation finishes, refresh the Gateways page and track the Gateway record status on the Connection Status field.
Note
To uninstall the Axonius Gateway, execute the following command: ./axonius_gateway_launcher.sh uninstall
5. Configure and connect adapters to use an Axonius Gateway
Notes
Axonius Gateway is only required to connect adapters whose data sources are only accessible by an internal or segregated network and therefore do not have a direct connection to those data sources.
A Gateway should not be selected if the source for the adapter is accessible from the internet or from your network.
- Open the Adapters page. Click the Adapters icon on the left navigation panel.
- Search for and click the relevant adapter. The Adapter Connections page opens displaying the list of configured connections.
- Add a new connection. Click Add Connection. The Adapter Connection Configuration dialog opens.
- Populate the required information.
- Select the requested Gateway Connection on the Gateway Name field. Click Save.
- To save your changes and to establish a connection to the adapter connection using the configured credentials, click Save and Fetch.
VM Backup Considerations
Host-level backup processes can interfere with the Axonius Gateway's real-time tunnel operations. Specifically, backup tools that "freeze" disk I/O to ensure data consistency (such as fsfreeze used by Azure VM Backup or VMware snapshots) can cause the gateway to become unresponsive or drop its connection to the Axonius instance.
Recommendations
To maintain a stable connection, consider one of the following approaches:
- Schedule Backups - Configure your backup window to occur outside of your scheduled Axonius discovery cycles to minimize the impact of temporary unresponsiveness.
- Exclude the Gateway VM - Because the Axonius Gateway acts as a stateless tunnel, it does not store critical persistent data. You can exclude the gateway VM from backups and simply redeploy using a fresh script if a host failure occurs.
Note
These recommendations address known connectivity issues related to VM freezing.
Gateway Installation Best Practices
In order to ensure the principle of least privilege, it is necessary to install the Gateway in a secure location within your network. This should ideally be a protected network where traffic in and out of the subnet can be strictly controlled. The default policy for traffic originating from your Axonius Gateway should be blocked. The ports and protocols required for the operation of an Axonius Gateway are listed in the table below, and only these connections should be permitted through your firewall.
Replace HOSTED_ID with your Axonius Hosted ID:
Axonius-hosted (SaaS)
| Source IP | Destination | Port | Application | Note |
|---|---|---|---|---|
| Gateway Server IP | HOSTED_ID.on.axonius.com | TCP/443 | HTTPS | GUI Access. Required for fetching the Gateway container. |
| Gateway Server IP | tun-HOSTED_ID.on.axonius.com | TCP/443 | OpenVPN | Gateway Connection |
| Gateway Server IP | Internal Systems | Various | Various | Adapter Data sources. Add one rule per adapter connection, using the correct destination IP/Port/Protocol |
Note
The domains listed in the table above use dynamic IP addressing. Ensure that any firewall allow-listing is done by domain name and not by IP address.
Customer-hosted (on-premises / private cloud)
| Source IP | Destination | Port | Application | Note |
|---|---|---|---|---|
| Gateway Server IP | Primary Axonius IP | TCP/2212 | OpenVPN | Gateway Connection |
| Gateway Server IP | Primary Axonius IP | TCP/443 | HTTPS | Required for fetching the Gateway container |
For more details about configuring adapter connections, see:
Updated 2 days ago