---
updatedAt: 2026-10-13T14:48:34.000Z
agentTools:
projectIndex: https://docs.axonius.com/llms.txt
---
# phpIPAM
phpIPAM is an open-source web IP address management application (IPAM).
## Asset Types Fetched
This adapter fetches the following types of assets:
* Devices, Users, Networks
## Before You Begin
### APIs
Axonius uses the [phpIPAM API](https://phpipam.net/api/api_documentation/).
### Authentication Methods
Username and Password **OR** API Token
### Required Permissions
The value supplied in [User Name](#parameters) must have read access to devices.
To read users, the supplied [User Name](#parameters) must have rwa permissions.
### Setting Up phpIPAM to Work with Axonius
To gain access to the API:
1. Login to phpIPAM with a user that has admin permissions.
2. Go to **Settings** and enable the API module.
3. Go to **Settings** → **API** and click **Create API key** to create a new API App (application). The application should have **Read** permissions. Set all APP params as desired for your APP.

4. Use the **App id** in the [Application ID](#parameters) field in the adapter connection configuration dialog.
## Connecting the Adapter in Axonius
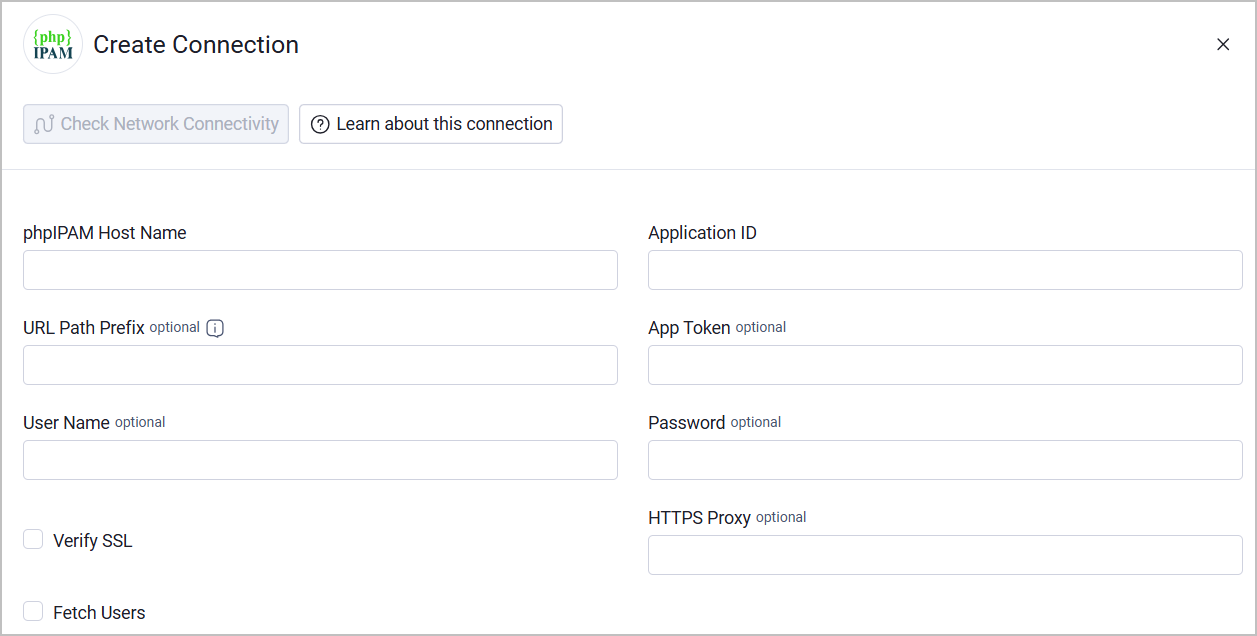
To connect the adapter in Axonius, provide the following parameters:
### Required Parameters
1. **phpIPAM Host Name** - The hostname or IP address of the phpIPAM server.
2. **Application ID** - The App id that you received when creating the API App in phpIPAM.
3. **User Name** and **Password** - The credentials for a user account that has the [Required Permissions](#required-permissions) to fetch assets. These parameters are **optional **when an App Token is provided (see below).
### Optional Parameters
1. **URL Path Prefix** - The path between the host name and api. For example, for `https:///ipam/api//`, enter `ipam`. Leave empty when phpIPAM is served from the root of the host.
2. **App Token** - A phpIPAM application token. When this parameter is provided, the adapter uses it instead of obtaining a token with a user name and password.
3. **Verify SSL** - Select whether to verify the SSL certificate of the server against the CA database inside of Axonius. For more details, see [SSL Trust & CA Settings](https://docs.axonius.com/axonius-help-docs/docs/certificate-settings#ssl-trust-ca-settings).
4. **HTTPS Proxy** *(optional)* - Connect the adapter to a proxy instead of directly connecting it to the domain.
5. **Fetch Users** - Select whether to fetch users' data from the phpIPAM server.
To learn more about common adapter connection parameters and buttons, see [Adding a New Adapter Connection](https://docs.axonius.com/axonius-help-docs/docs/adding-a-new-adapter-connection).
## Advanced Settings
Note
Advanced settings can either apply for all connections for this adapter, or you can set different advanced settings and/or different scheduling for a specific connection, refer to [Advanced Configuration for Adapters](https://docs.axonius.com/axonius-help-docs/docs/advanced-configuration-for-adapters)
1. **CIDR exclude list** - Specify a comma-separated list of CIDRs to be excluded.
2. **CIDR include list** - Specify a comma-separated list of CIDRs to be included.
3. **Fetch subnets addresses as devices** - Select whether to fetch all the addresses under all the subnets in phpIPAM and create devices from these addresses
* API used - /api/my\_app/subnets/`{id}`/addresses/
4. **Enable Custom Parsing** - Enable this option to define how to parse specific fields from the raw data fetched. You can choose to parse the data into an already existing field, or create a new one. See [Adapter Custom Parsing](https://docs.axonius.com/axonius-help-docs/docs/adapter-custom-parsing) for more information.
NOTE
To learn more about **Adapter Configuration** tab advanced settings, see [Adapter Advanced Settings](https://docs.axonius.com/axonius-help-docs/docs/advanced-settings).